These ornament craft ideas run from a 5-minute glitter foam Santa to a Saturday morning of quilting and stuffing, and the one that fits your weekend depends on whether you need something dry and done before bedtime or a project you can walk away from while glue sets.
Seventeen pony beads and half a pipe cleaner make one candy cane, which is all the proof you need that the materials here come from a grocery store aisle or the junk drawer, not a specialty shop.
[link-whisper-related-posts]1. DIY Clothespin Snowflake
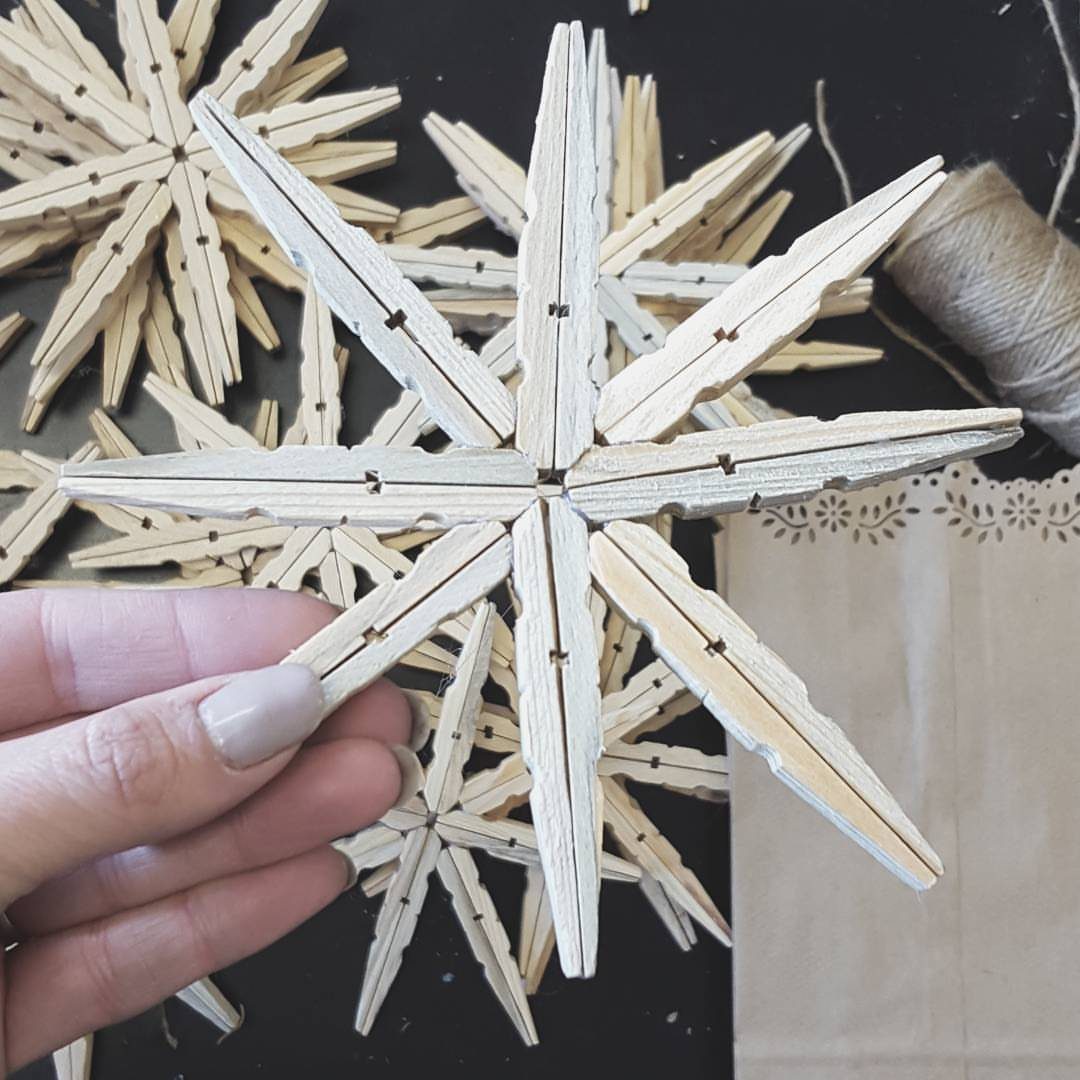
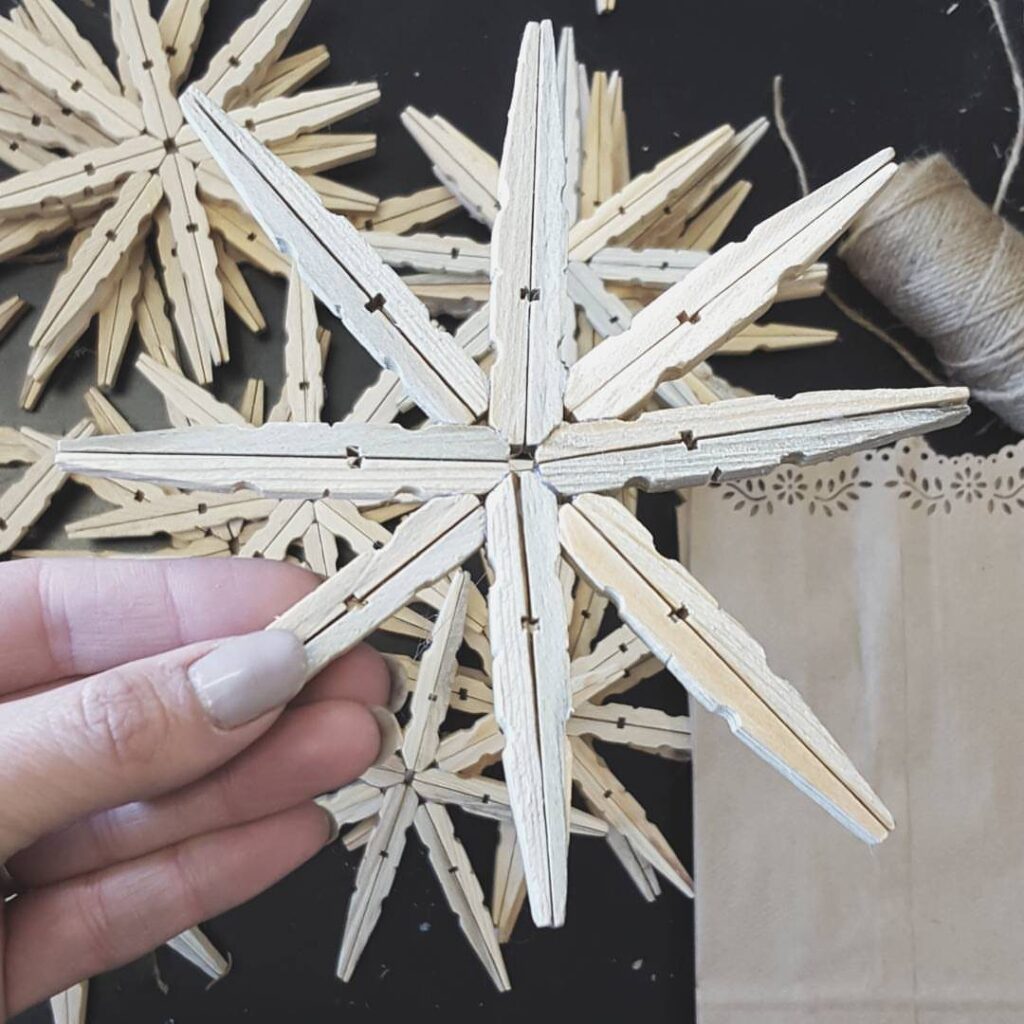
A clothespin snowflake looks like something that should cost more than it does at a boutique, but the parts come from a grocery store aisle.
Half-pins glue into a radial pattern, the flat sides facing out, and the spring mechanism stays in or comes out depending on how rustic you want the center to look.
I have seen these done with the pins left natural, painted white, or stained dark to read as metal from a distance.
Getting the first 2 pins truly perpendicular is what matters; after that, the rest slot against them like a fence.
A dab of wood glue at each joint holds fine for indoor use. Twine through the center spring makes the hanger.

Valuable Package:You will receive 100 pieces mini resin snowflakes ornaments in 3 sizes: 25pcs 0.59” silver tiny snowflakes, 45pcs 0.78” and 30pcs 1.1” mini white snowflakes, they come in a box for easy storage and carry; so many diy Christmas resin snowflakes ornaments perfect for your Christmas art crafts

Generous Quantity: this set includes 400 pieces snowflake wood slices in 10 styles, providing ample pieces to satisfy all your home and party decorating needs during the festive season

Size: 20mm / 0.79inch. Thickness: 2mm / 0.08inch. The wooden snowflake is a mini item.
2. Felt Gingerbread Men Ornaments
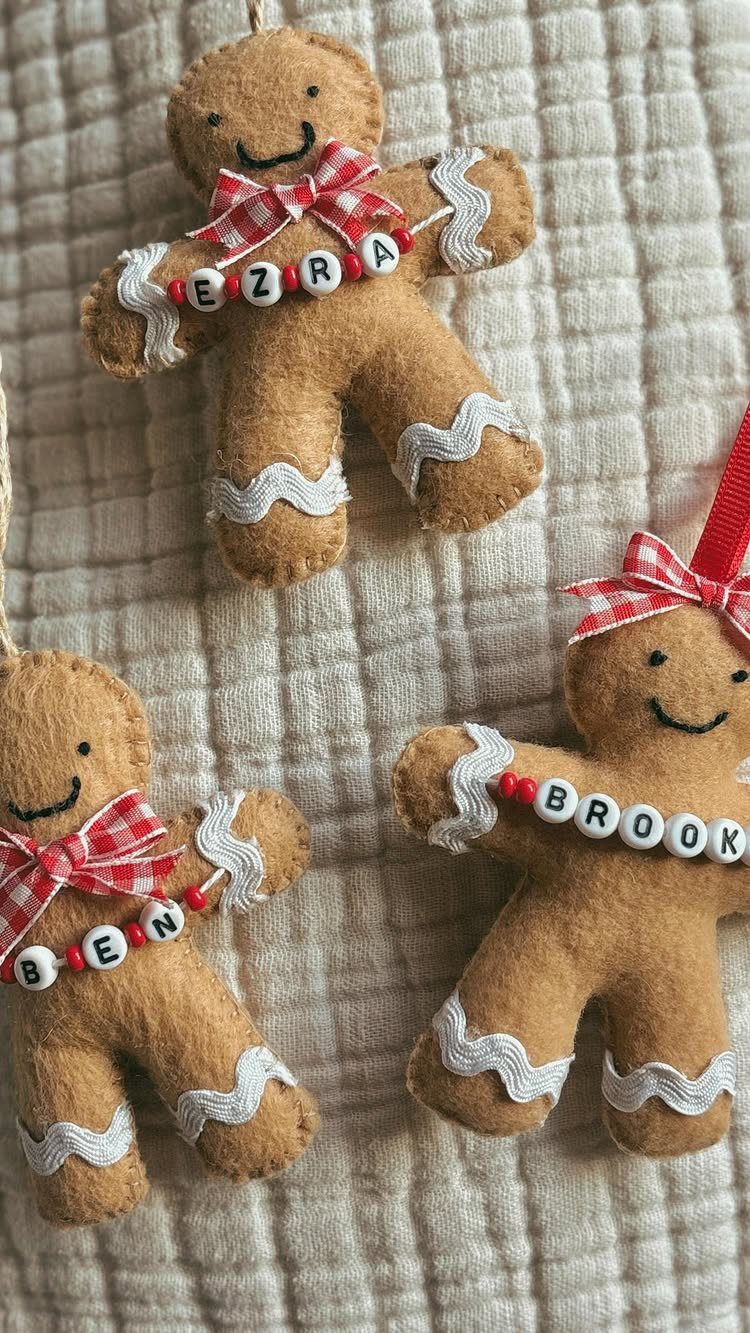
These work best when you treat felt like cookie dough: roll it flat, press a gingerbread man cutter into it, and blanket-stitch or glue the edges before stuffing lightly with batting.
The felt version never cracks, never burns, and stores flat if you skip the stuffing.
What sells the look is the trim. Rickrack becomes icing, tiny beads become buttons, and a gingham bow at the neck covers any lump in your stitching.
I would choose wool felt over acrylic; it costs more but frays less and takes a needle without the drag that makes your hand cramp.
Personalize with letter beads if you are making them for specific kids, or leave them blank and let the shape do the work.

Sufficient quantity: you will get 20 pieces felt gingerbread men, 40 pieces eye ornaments, 20 pieces mouth ornaments, 20 pieces pink round accessories, 30 pieces bow accessories, 40 pieces button accessories, 80 pieces wavy accessories, 10 pieces of Christmas hat accessories; Please refer to the pictures for more details, rich quantity to meet your various DIY needs and decoration needs

DIY Christmas ornament kit: Create six felt applique handmade keepsakes to display during the season

Complete DIY Crafts Set: the package 24 pieces of Christmas craft kits, and 1 roll of gold rope of about 32.8 feet/ 10 meters in length, a nice combination to satisfy your crafting and decorating needs, and create tons of fun for your Christmas party
3. Cornstarch Dough Ornaments
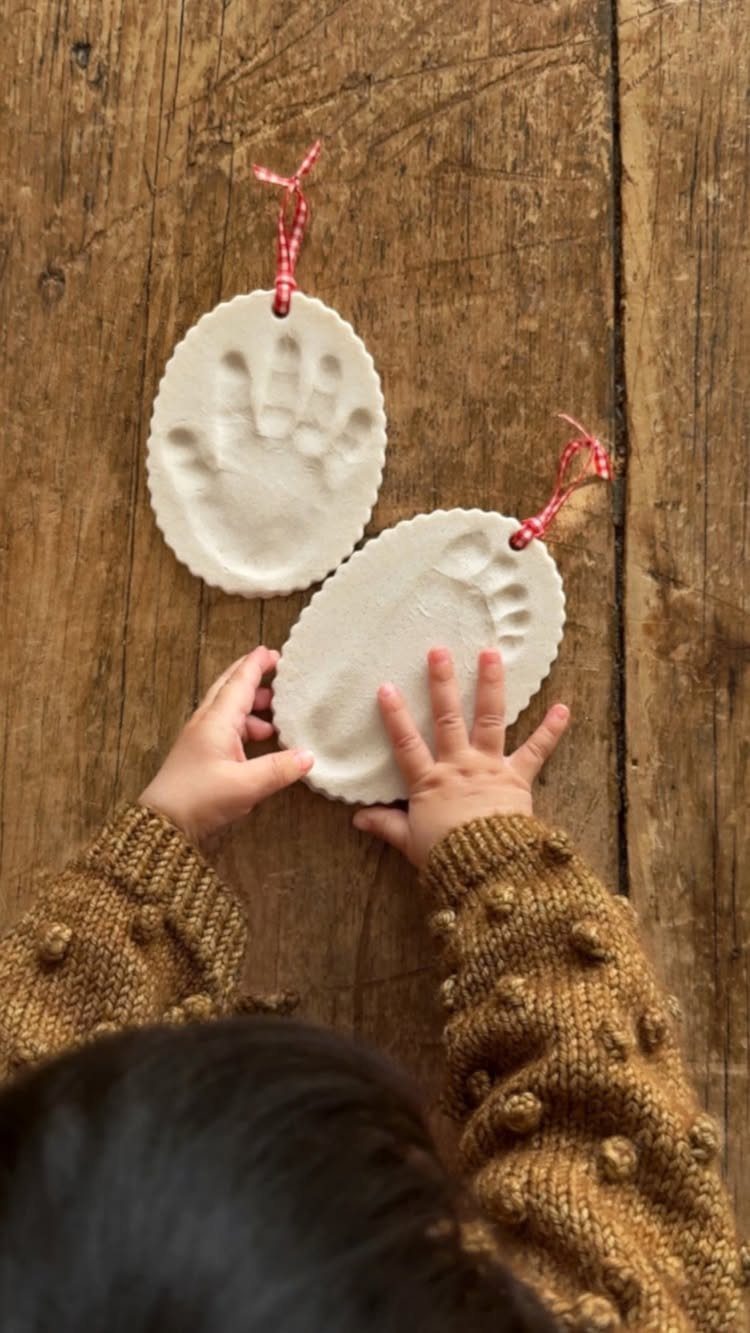
This dough bakes hard and white, closer to porcelain than the yellowish finish of salt dough, and the handprint or footprint pressed into it becomes a keepsake without the sentimental markup of a photo studio.
The recipe is forgiving: equal parts cornstarch and baking soda, water until it forms a clay, then low heat in the pan until it thickens.
Roll to a thin, even layer, press the small hand, poke the hole for hanging before it dries. Bake low and slow until hard, usually a couple of hours.
Paint after cooling, seal with clear acrylic if you want them to last past the decade, and write the year on the back in permanent marker before you forget which child and which Christmas.

Christmas Tree Decorations: included are 12 felt gingerbread Christmas ornaments, with 6 different styles, 2 of each style; They come with red and white strings for easy hanging; These vintage Christmas ornaments are colorful, diverse in style, and fun and cute in decoration, fitting the Christmas theme and adding to the festive atmosphere

DIY Christmas ornament kit: Create six felt applique handmade keepsakes to display during the season

DIY Christmas garland kit: Create a festive handmade accent for your holiday home
4. Snow Globe Ornaments
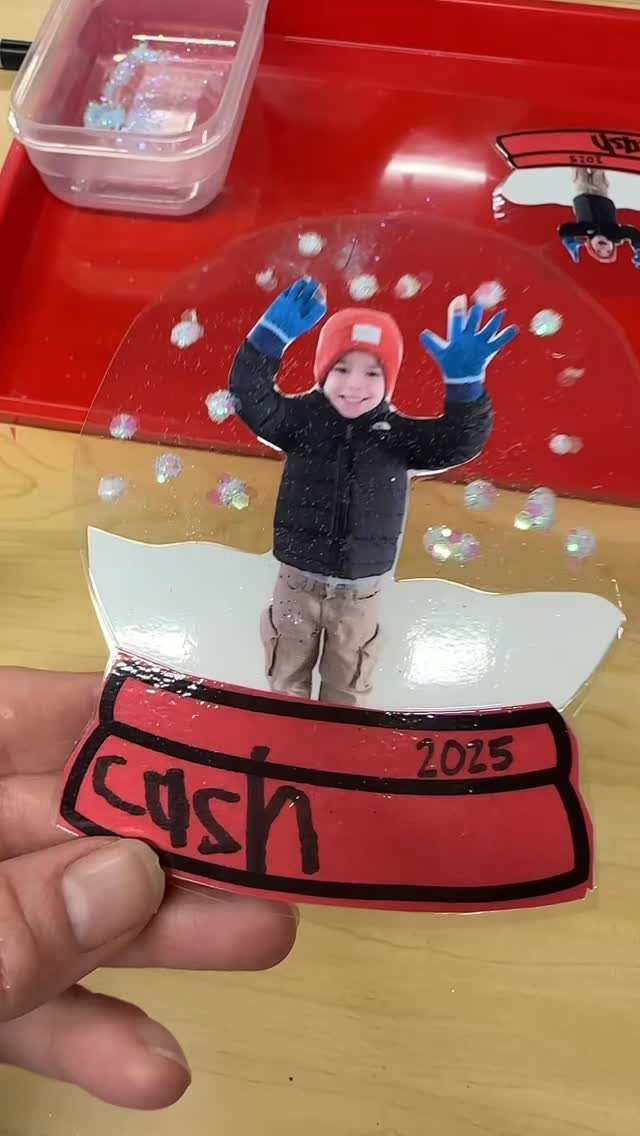
The dollar store version uses a clear fillable ornament or small plastic jar instead of glass, which means no heirloom anxiety when a kid shakes it.
A laminated photo cutout stands inside on a folded paper tab, with glitter or sequins for snow and a few drops of glycerin in the water so the fall slows to something magical.
Label the base with a name and year to turn it into a dated keepsake without extra effort.
The seal matters most: a ring of hot glue or strong adhesive around the lid joint, then checked over a sink before you trust it to the tree. Dry completely before hanging.

Ideal Baby Shower Gift - KeaBabies Baby Hand and Footprint Kit comes with everything you need to capture lasting memories of your newborn’s precious moments. No additional purchases required, making this baby print kit an ideal newborn Christmas gifts.

CREATE A CHERISHED BABY KEEPSAKE: Capture baby’s tiny handprint or footprint with this DIY hanging ornament kit, designed to preserve those special newborn details as a meaningful keepsake for years to come.

Ideal Baby Shower Gift - KeaBabies Baby Hand and Footprint Kit comes with everything you need to capture lasting memories of your newborn’s precious moments. No additional purchases required, making this baby print kit a thoughtful baby shower gift.
5. Yarn Wrapped Christmas Trees
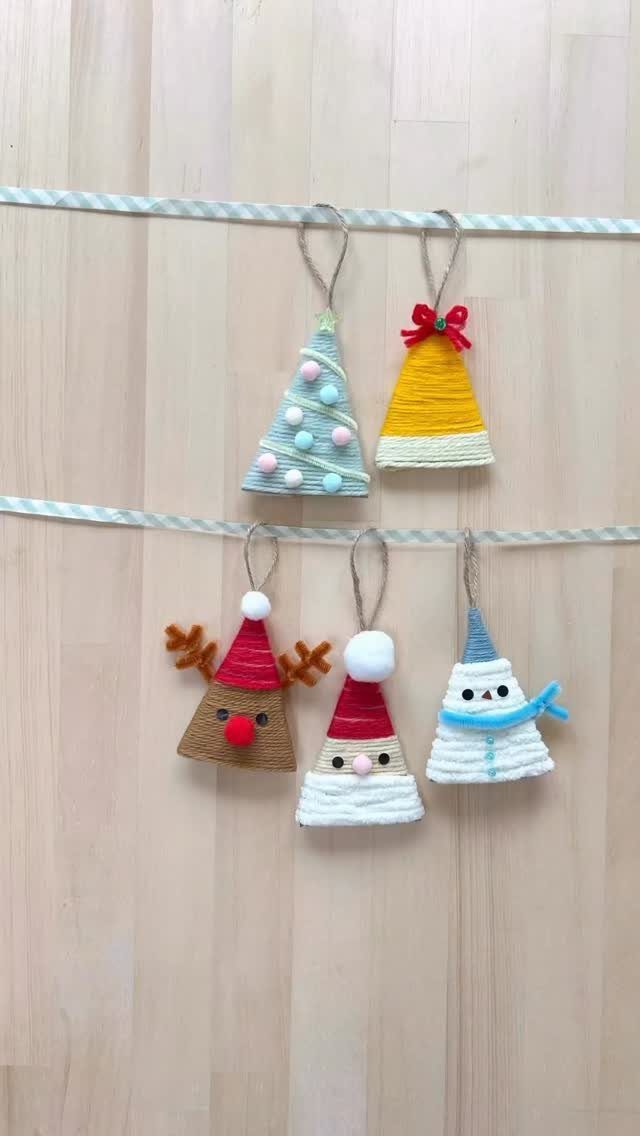
A cardboard cone, yarn in two or three colors, and a glue gun are the whole list.
Wrap from bottom to top, tacking at the start and each color change, and the yarn fills its own gaps if you keep the tension even.
Trees, bells, reindeer, and snowmen all build on the same cone base, which means one template serves a whole afternoon of making.
This is where leftover yarn finds its purpose: the partial skein from a scarf, the gift wrap ribbon too short to tie a bow.
I would choose wool or cotton over acrylic for the matte texture, and I would not overthink the pattern. Random stripes look intentional once they are uniform.
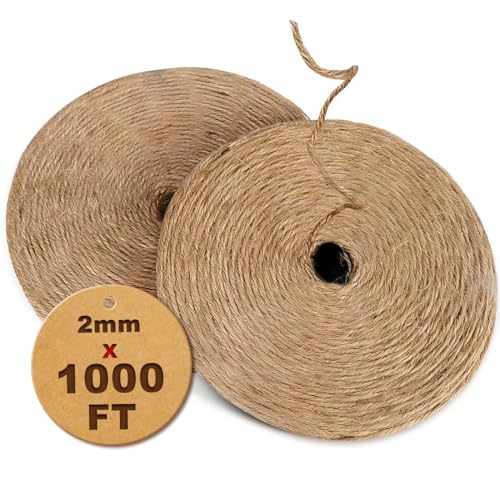
【PREMIUM CLASSIC TWINE】3 ply, 2 mm diameter, 1000 feet in size. Made from premium natural fibers originating in Bengal, our jute twine is strong, elastic, resistant to wear, and minimally shrinking. It is easy to use for various household tasks.

2 ROLL COTTON TWINES -These red white green and red white Christmas gift wrapping bakers’ twine are made of 100% eco-friendly cotton, durable and vibrant color twisted twine, not easy to break and safe to use

Quantity Package: our package includes a massive set of 200 pieces Christmas hangers string; With so many ribbons, you won't have trouble hanging all your precious ornaments this Christmas festive
6. Paper Star Ornaments
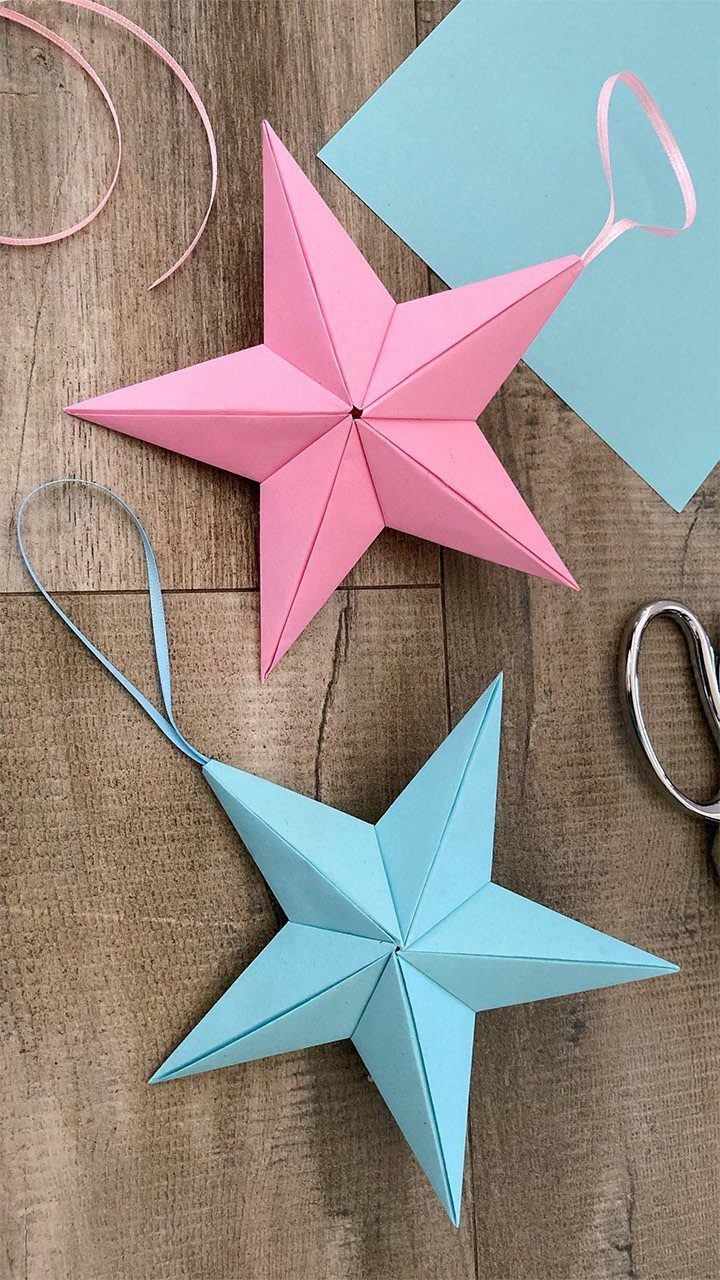
German folded stars use strips of paper, woven and tucked in a sequence that looks impossible until your hands learn the rhythm.
The result is three-dimensional without glue, held by tension and the last tucked end, and it hangs by a ribbon loop threaded through a gap.
Paper weight matters more than you would think. Copy paper works but creases hard; quilling paper or thin cardstock folds cleaner and holds the shape longer.

Size: 20mm / 0.79inch. Thickness: 2mm / 0.08inch. The wooden snowflake is a mini item.

Material: these snowflakes with diamond-like design are made of clear acrylic material; They will have different beauty in different angle, creating a kind of dreamy atmosphere; We also provide a transparent fishing line and snowflake positioning buckles for you to use
Size: 20mm / 0.79inch. Thickness: 2mm / 0.08inch. The wooden snowflake is a mini item.
7. Santa Ornament
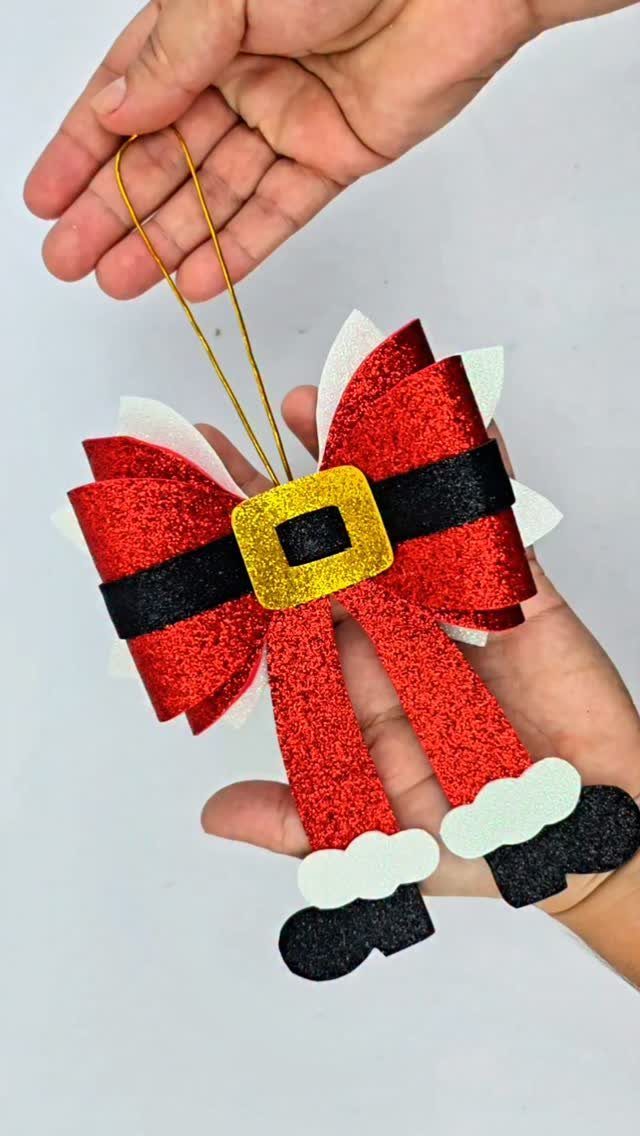
Glitter foam works for the whole figure: boots, belt with a gold buckle, and the red suit body, backed onto a bow that hangs from the tree.
The foam cuts clean with a sharp scissors and the glitter side hides any ragged edge.
This is a 5-minute project once the pieces are cut, which makes it ideal for a weeknight when the supplies are already out for something else.
I would trace the parts from a printed template rather than freehanding; the symmetry is what sells the silhouette. A plain clothespin or loop of ribbon through the center works as hanger.

🎅 CREATIVE GINGERBREAD HOUSE CRAFT KIT — Spark holiday joy with our adorable felt gingerbread house kit! This Christmas felt set bursts with vibrant, candy-colored charm and comes loaded with 40+ gingerbread-themed hook and loop ornaments: gingerbread man, gingerbread woman, reindeer, Christmas trees, cupcakes, candies, candy canes, and twinkly colorful bulbs. Perfect for little creators to DIY and decorate their very own Christmas masterpiece!

Sufficient quantity to use: you will receive 60 pieces of felt gingerbread man ornaments in this package, there are 3 colors in the package and each color has 20 pieces, sufficient quantity and color choices for you to use, you can share it with your family and friends, or as a lovely Christmas gift for friends
8. Pine Cone Ornaments
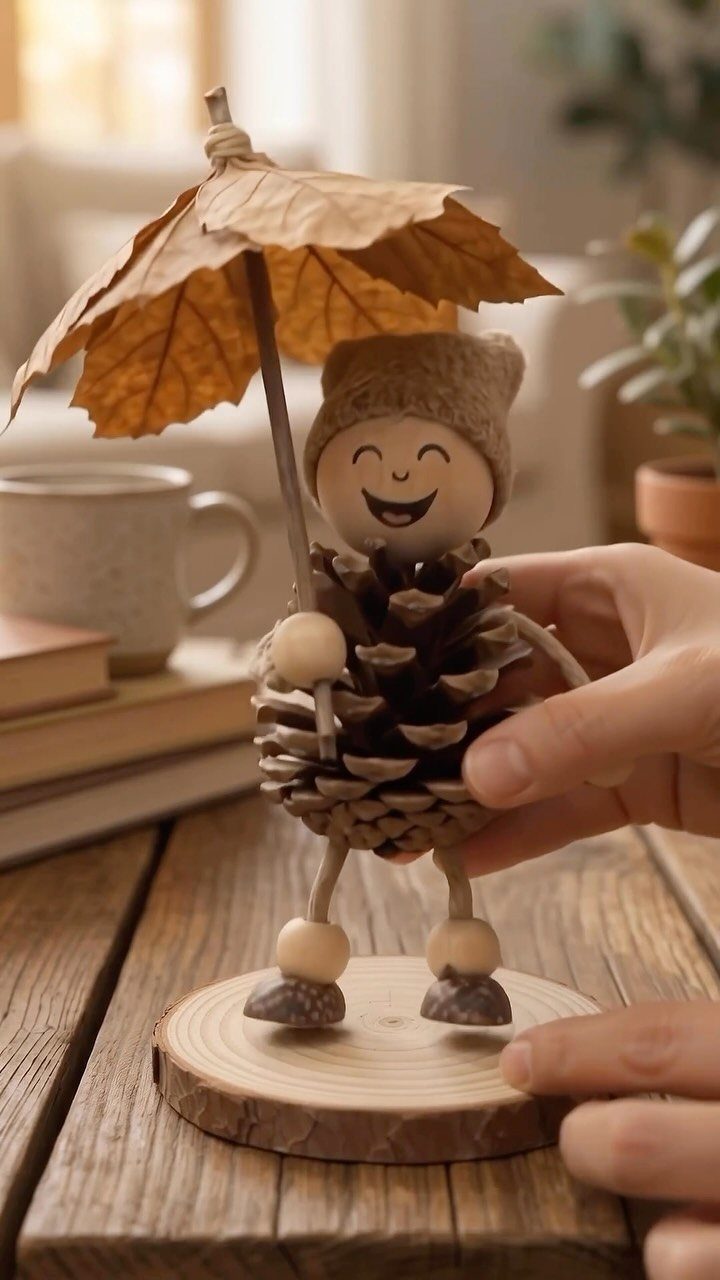
A pine cone’s natural geometry already reads as a body: the scales become fur or feathers depending on what you add.
Pom-poms or glitter hot-glued into the scales dress it up for color. The glue matters more than the decoration; low-temp hot glue grabs the woody surface without the mess of craft glue running down.
I would collect cones in fall and bake them low for an hour to set any sap and evict passengers before they come indoors.
9. Salt Dough Handprint Ornament
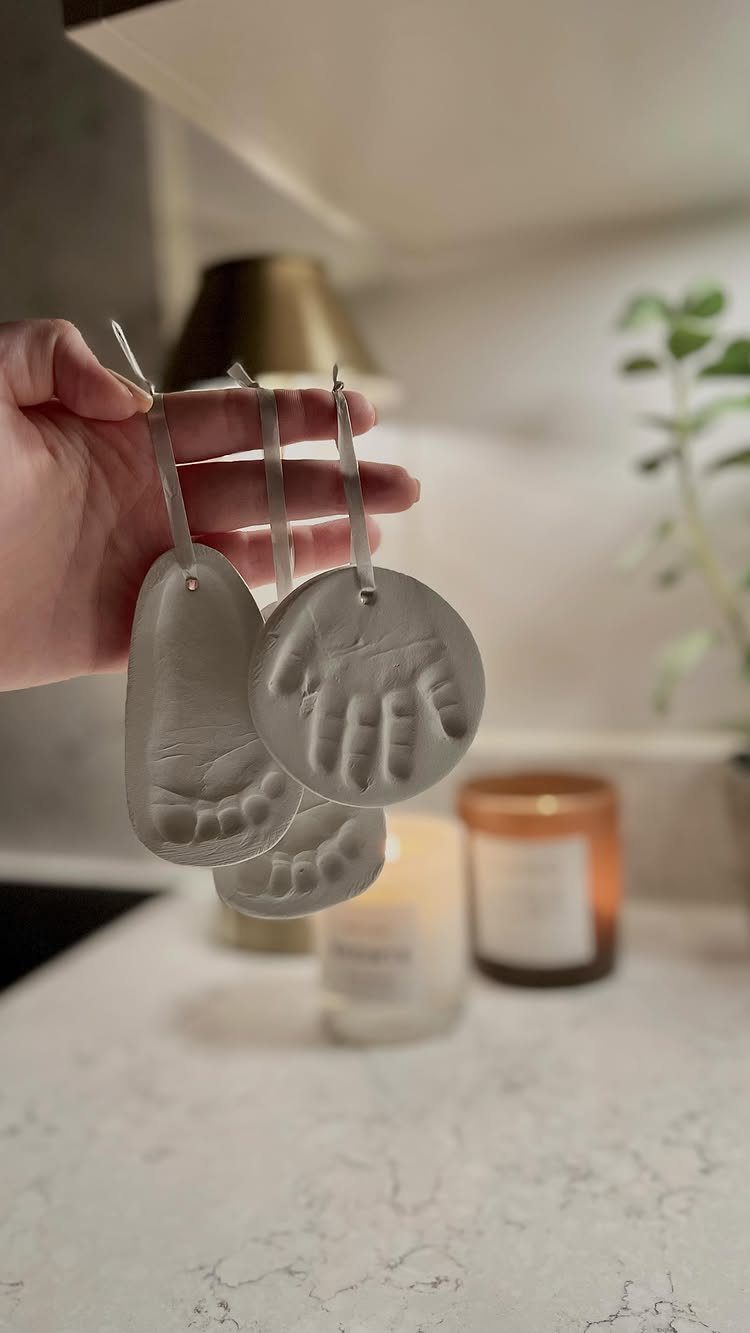
Salt dough presses soft and bakes hard, and a child’s hand or foot leaves a mark that records a size they will outgrow before next Christmas. The dough is flour, salt, and water, mixed until it feels like play clay.
Roll thick enough that the impression does not punch through, press firmly, and poke the hanging hole while the dough is still soft.
Bake until hard and fully dry, paint after cooling, and write the year on the back before the memory fades.
Thumbprints pressed in a cluster become reindeer with the addition of antlers drawn in marker; the same dough serves both keepsakes and quick decorations.
10. DIY Photo Ornaments
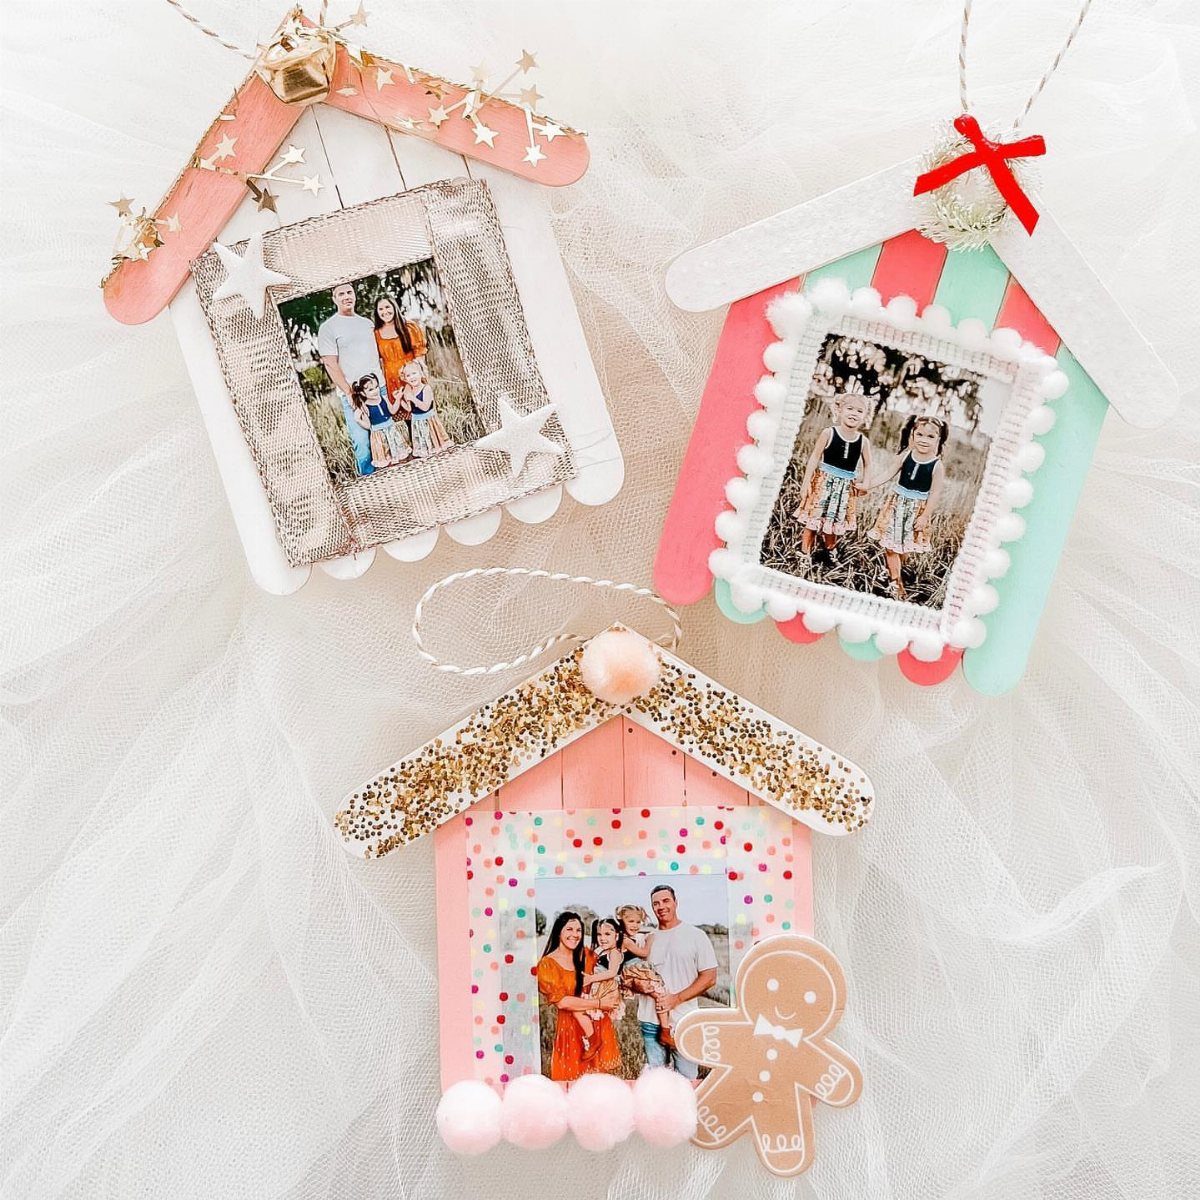
A photo inside an ornament turns the tree into a family timeline, one year per branch.
Craft sticks glued into a rectangle with a peaked roof make the house shape; trim the photo to fit behind a window of tulle or leave it open to the front.
Clear fillable baubles work too: roll the photo to slip through the neck, let it uncurl inside, and add a loop of ribbon before sealing.
I would print on regular paper rather than photo paper; it bends without cracking and lies flatter against the curve of a round ornament. Label the back with the year, always.
11. Glitter Ornaments
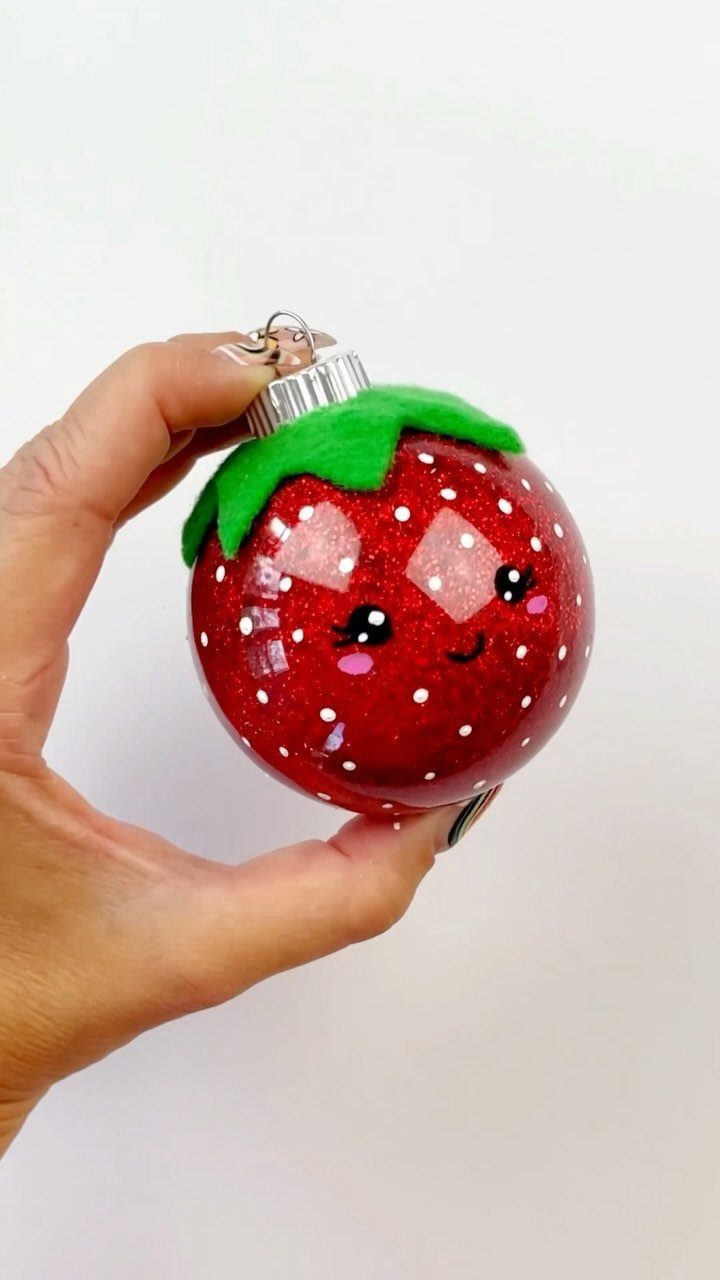
Clear glass or plastic spheres take glitter inside without the shedding that covers every surface when glitter stays outside.
A swirl of glue or floor finish on the interior, glitter poured in and shaken to coat, and the excess tapped out through the neck.
Red glitter with painted seed dots and a felt cap make a strawberry, but the method is the same for any colorway.
I would work over a shoebox or tray; the glitter that escapes is still enough to find for months. Seal the cap with a drop of glue if you have small children or curious pets.
12. DIY Wine Cork Reindeer
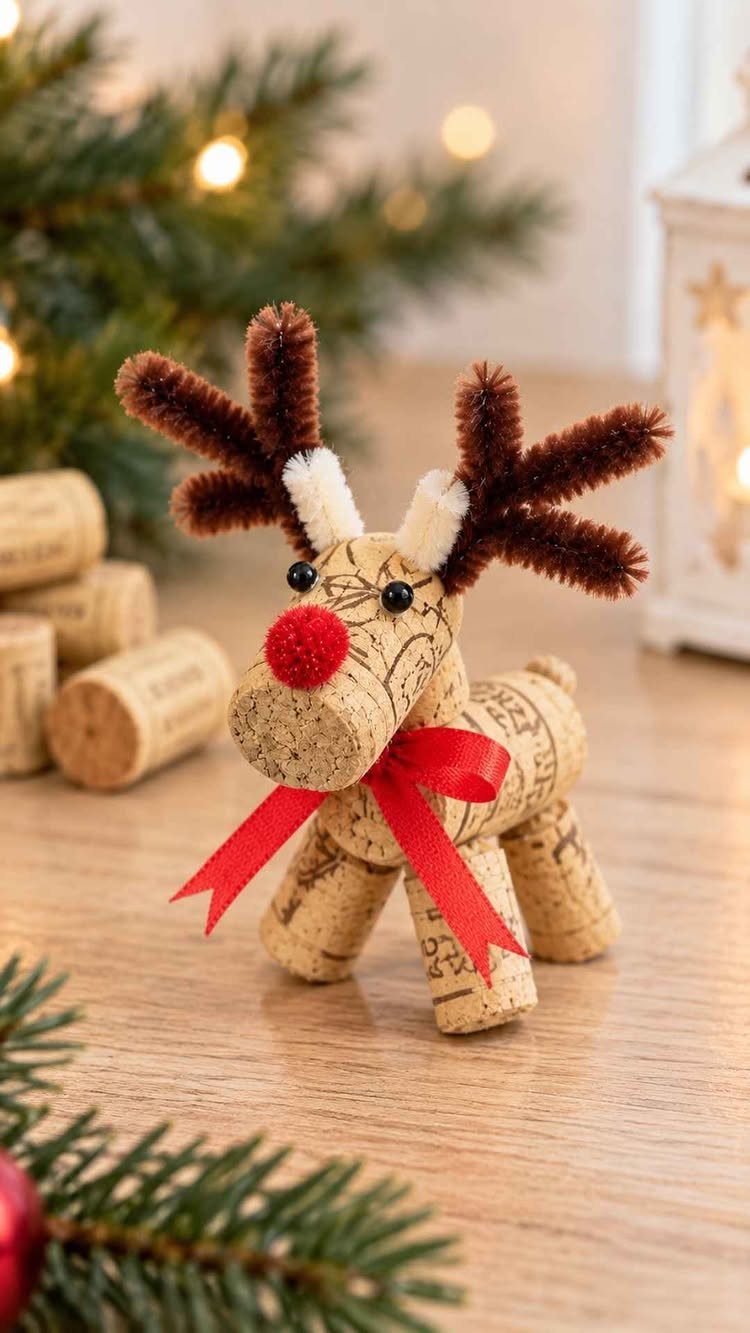
Three corks make the body: one vertical for the torso, one horizontal for the head, one split or whole for the legs. Pipe cleaners twist into antlers and a red pom-pom becomes the nose, with googly eyes completing the face.
The corks need a pilot hole for any screw eye or wire hanger, or you can glue a ribbon loop to the back.
I would use a strong craft adhesive rather than hot glue for the cork-to-cork joints; the porous surface can let hot glue cool before it grips. Corks from the same bottle type match in diameter and make a neer silhouette.
13. Angel Ornaments
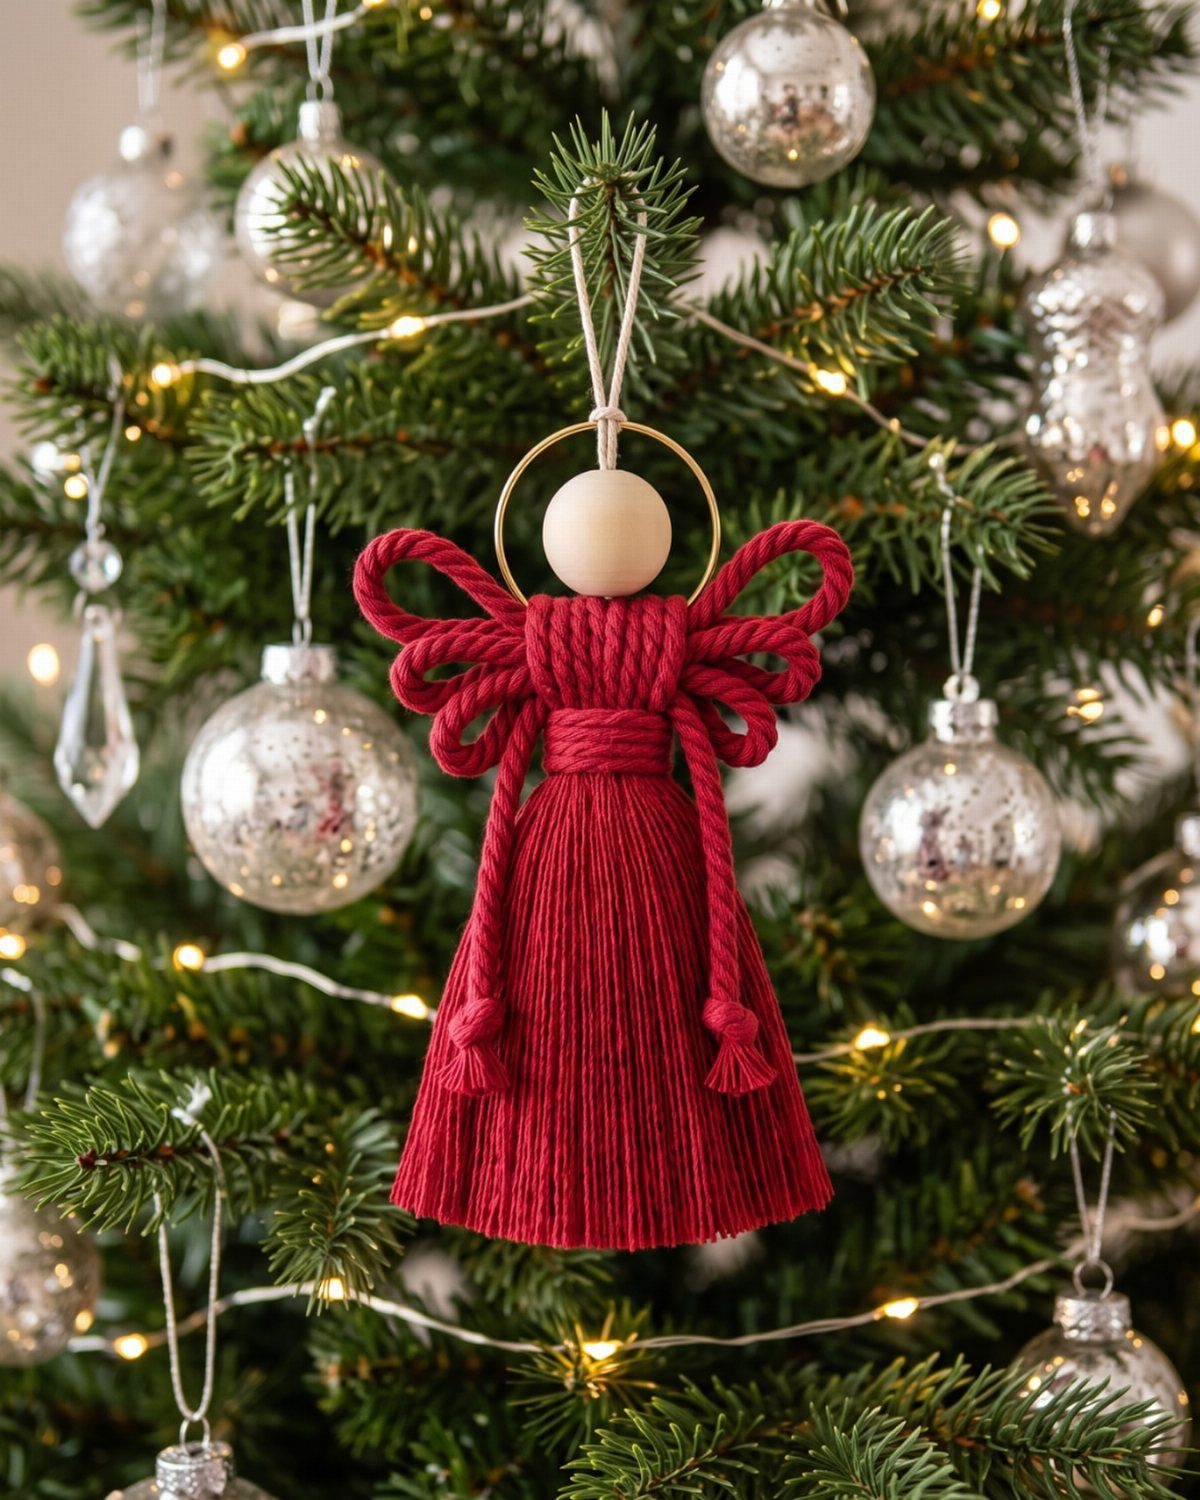
A wooden bead for the head and yarn for the body turn a few inches of fiber into something that reads as angelic from across the room.
Macrame angel ornaments skip the glue entirely; knotting holds the shape through years of storage.
Burlap works for a rustic gift a child can manage, with a drawn face and yarn hair. Noodles, painted white, become the body and wings in another version I have seen.
The common thread is letting one material do most of the work: the shape of an angel is simple enough that a single recognizable element, a halo or a wing silhouette, carries the whole idea.
14. Popsicle Stick Snowmen Ornaments
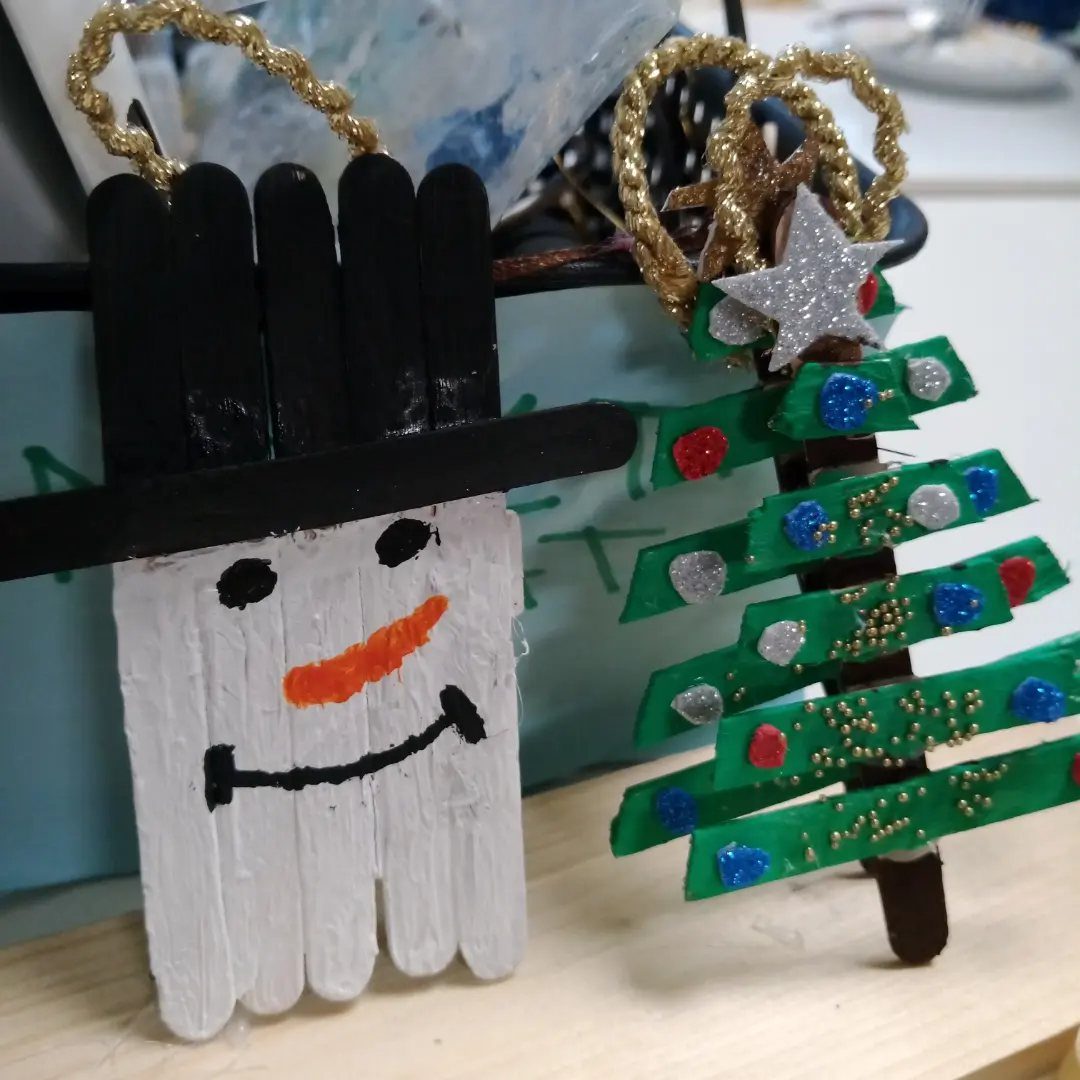
3 popsicle sticks glued into a snowman shape, painted white, with a drawn face and a ribbon loop, is the core project.
A gold ribbon dresses the stick snowman up more than twine would, and the sequined tree beside it shows how far the same base can stretch.
Paint sticks flat before assembly; the gaps between them become less obvious once the face and buttons draw the eye downward.
I would keep the stick count low, three or four, so the proportion stays closer to squat than stretched. A real twig for arms, hot-glued across the back, beats drawn arms for texture.
15. Quilted Christmas Ornaments
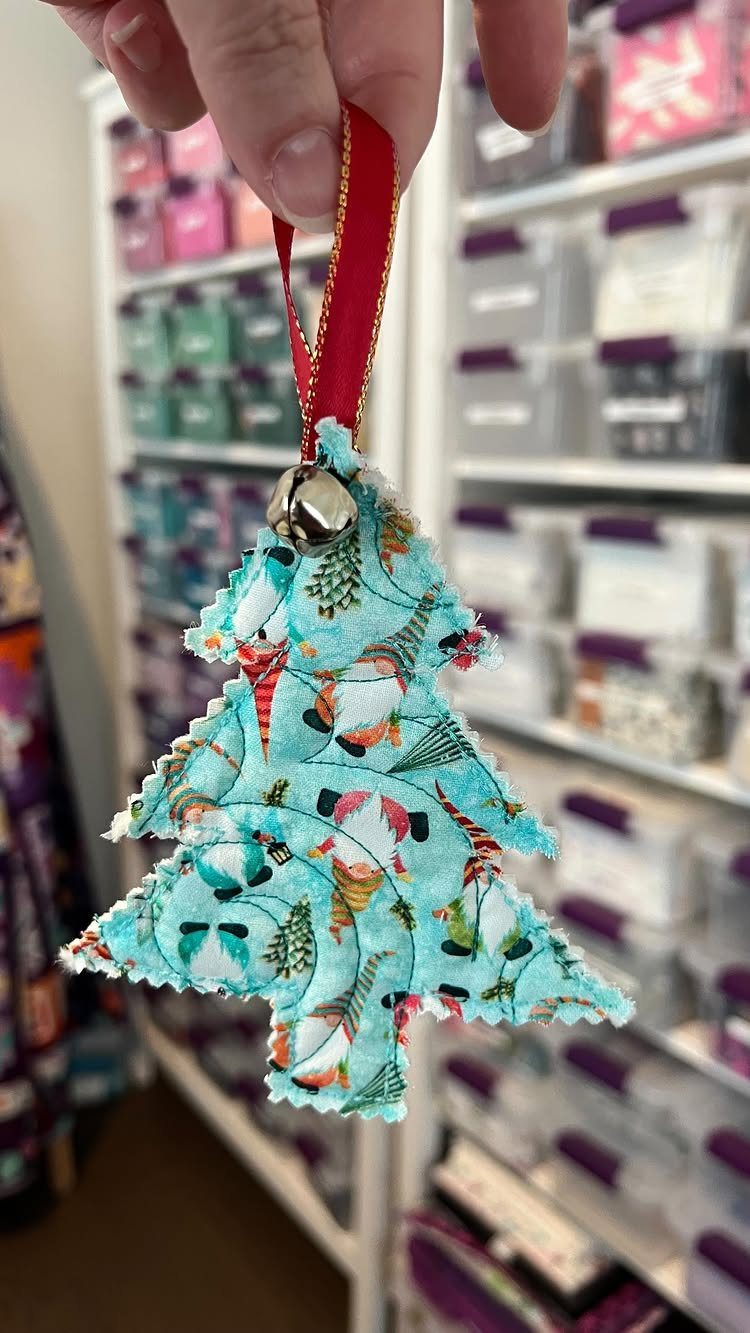
Folded fabric, stitched around a shape, and stuffed lightly before closing gives a dimensional ornament that reads as antique without needing to be old.
Printed gnome fabric, a jingle bell at the peak, and a red ribbon loop finish the tree version, but the technique works for stars, hearts, or balls.
Quilted here means layered and padded, not patchwork; a single fabric with a busy print hides the stitching and does the visual work.
I would check that the print scale suits the size, a large motif on a small shape loses its detail, and I would cut 2 identical shapes, wrong sides together, with a quarter-inch seam allowance that disappears into the puff.
16. Candy Cane Ornaments
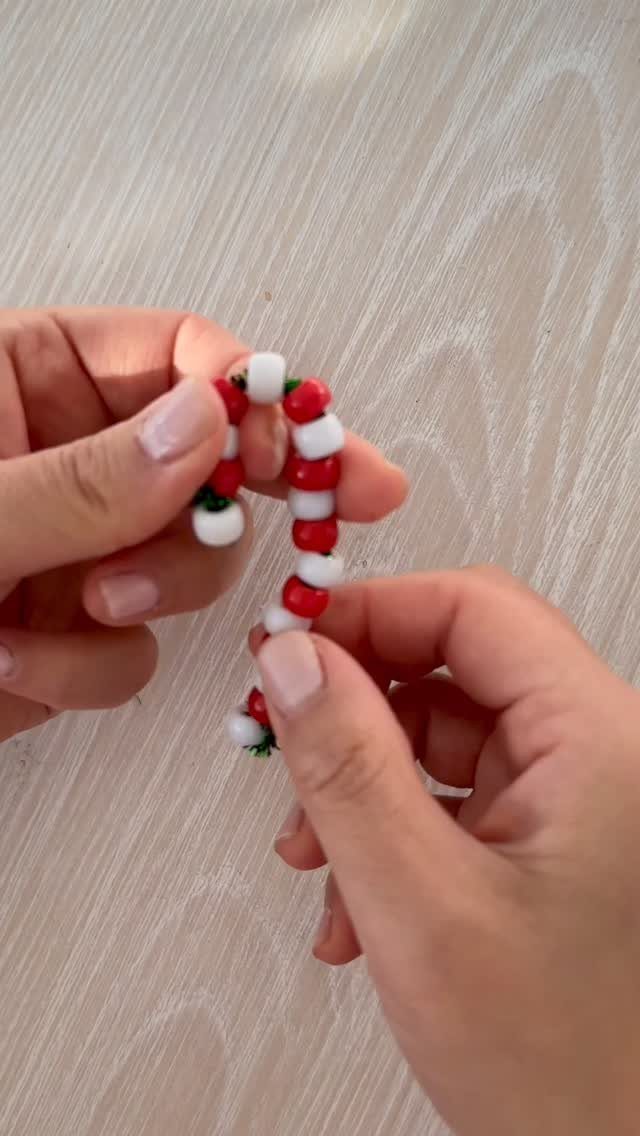
Seventeen pony beads and half a pipe cleaner make one candy cane; the pattern is the project, red and white alternating until the bend. The pipe cleaner holds the curve and the beads stay put without glue.
This is where a kid learns that pattern-making has a physical result.
Uniform bead size matters: mixed sizes gap or jam. I would sort beads into cups by color before starting, and I would cut pipe cleaners in half beforehand; a full length holds too many beads and the proportion goes wrong.
The ornament doubles as a counting exercise, and the finished piece is light enough for any branch.
17. I Spy Ornament
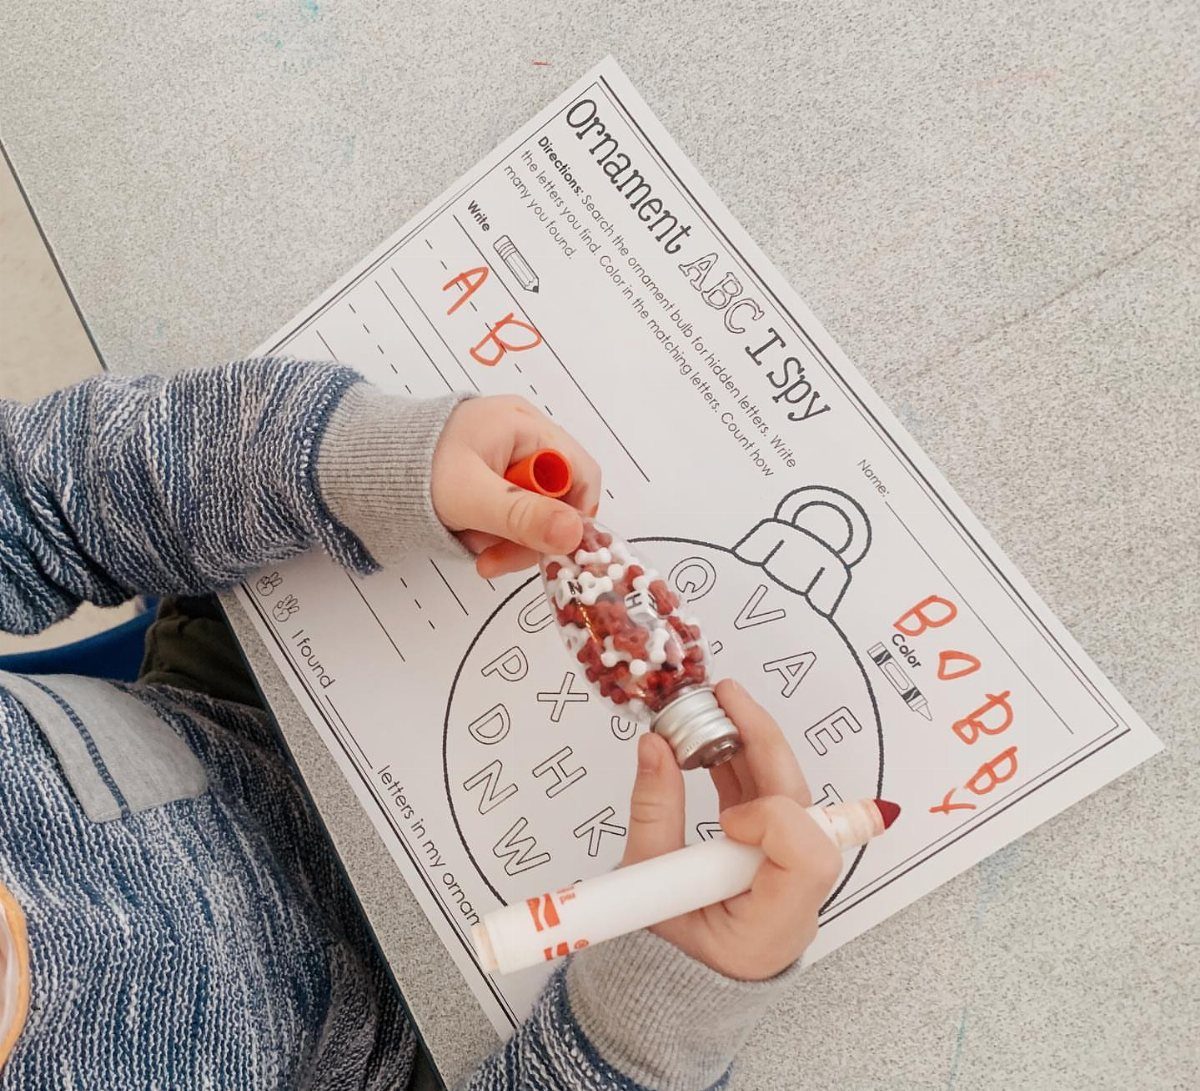
A clear fillable bauble, filled three-quarters with rice or poly-pellets, becomes a portable search game once you drop in five to ten tiny objects and seal the cap with hot glue.
The ornament pairs with a checklist worksheet; the child holds both, searching the globe while marking the paper.
I would choose objects that do not match the fill color; white beads in white faux snow disappear. A ribbon loop holds the checklist card, and the whole thing fits in a coat pocket for car rides or waiting rooms.
The seal is the safety step; hot glue the cap and test over a sink before handing it to a child.
18. Dried Orange Slice Ornaments
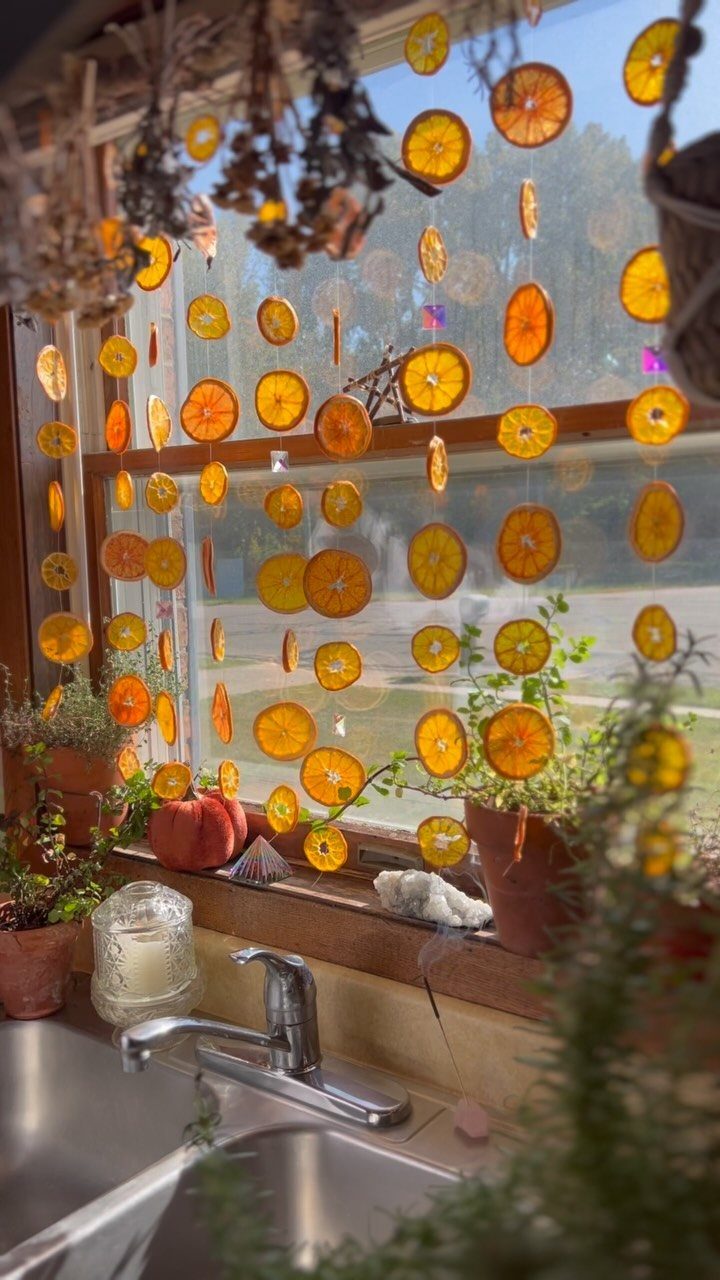
Orange slices, dried until they are stiff and translucent, thread onto twine and hang in windows where the light shows the pattern of the pulp.
Slice thin, a quarter inch or less, and dry low and slow; a dehydrator or an oven at its lowest setting, for several hours, until no moisture remains.
Thicker slices mold before they dry. The house smells of citrus for a day, which is half the point.
I would thread through the rind, not the flesh, for strength, and I would hang them where they do not touch fabric or paper; the oils can stain.
Budget-friendly Crafting
A dedicated workspace saves more time than it costs. Clear the table, put a tray under anything with glitter, and the evening cleans up in five minutes instead of thirty.
String ornaments need only glue, balloons, and yarn from a dollar store aisle; the balloon pops once the shell dries, and the hollow form costs pennies per piece.
The real expense is the hour or two you spend making them, not the materials, which come from around the house or a dollar store.
Family-friendly Activities
Cooking and crafting share the same learning path.
A child who measures 1 cup of flour for salt dough practices the same accuracy they would need for a cake, and the "recipe" logic, dry before wet, base before decoration, builds the same patience.
Pine cones, rice fills, and pipe cleaner bends all give sensory feedback that screens do not. The finished piece hanging on a tree carries the same pride as a plate they helped prepare.
Keepsake Potential
Growth records do not need a wall chart. A ribbon cut to a child’s height, folded inside a clear bauble with a dated note, becomes a measurement of time they can hold.
The value is in the dating; an unmarked ornament becomes a guess, but one with a year on the back tells its story without explanation.
Easy and Quick Projects
Glitter foam Santa figures, pipe cleaner candy canes, and popsicle stick snowmen all finish in a single sitting, and the mess stays contained.
Longer projects like cornstarch dough or quilted fabric need drying or stuffing time; schedule those for a Saturday morning when interruptions are fewer. A quick project completed beats an ambitious one abandoned on the half-finished table.