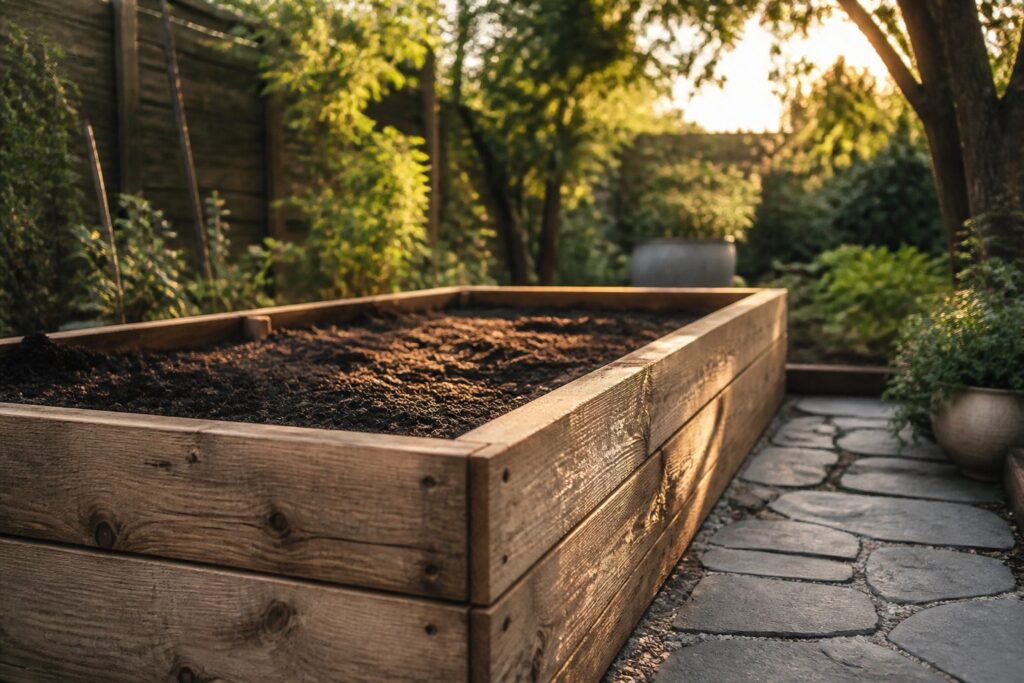
You can build a 4 by 8 foot raised bed in one afternoon for roughly $100 to $300, plus soil.
The mistake most people make happens before they buy a single board: they pick a spot that looks bright at noon and turns dim by mid-afternoon, then watch stunted tomatoes struggle all season.
Twelve inches of depth is the floor for carrots or tomatoes, not a suggestion, and that single measurement shapes every choice that follows.
[link-whisper-related-posts]1. Choose a Location
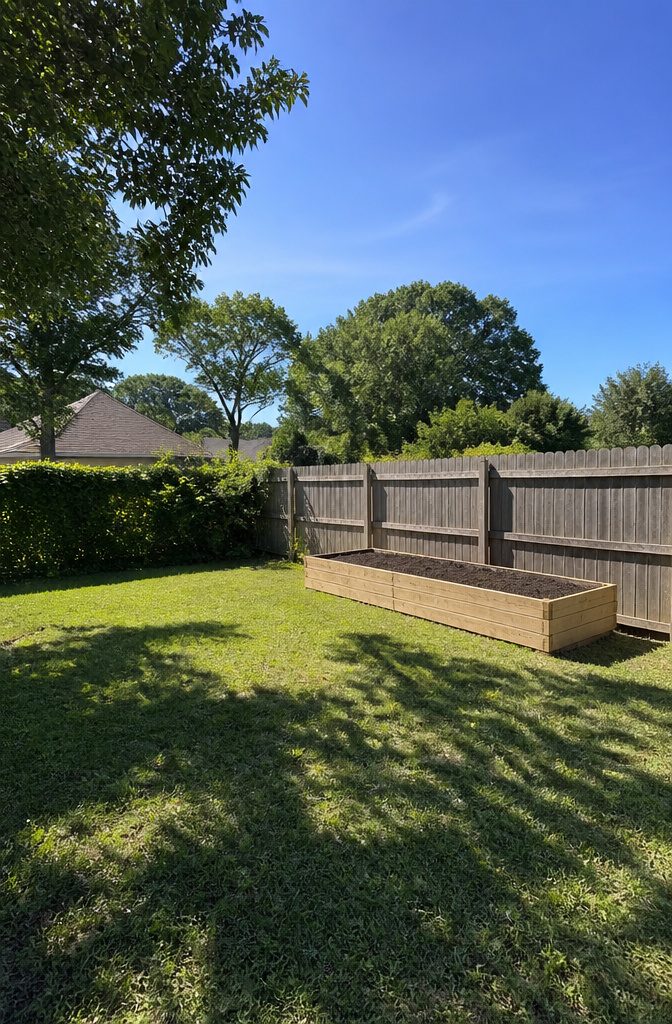
Sunlight is the first thing that eliminates most spots in a yard. Vegetables need at least 6 to 8 hours of direct sun per day, and it is hard to make up for weak light later with better soil or more water.
A fence that looks bright at noon can turn dim by three o’clock, so check the light at different hours before you commit. The tomato plants stayed stunted all season.
Look for open ground away from trees and structures that throw shade. South-facing fences are an exception; they will not block the light the way a north-side wall does.
If you are not sure how the sun moves through your space across the year, a sun-tracking app can map it out faster than a full year of waiting and watching would.
Level ground matters just as much.
My first beds sat on a slight slope I had ignored, and after the first hard rain I watched the soil I had mixed wash out the low end while the uphill side sat high and dry.
The wood frame itself started to twist where the bricks I shoved underneath did not quite match.
It took less than an hour to dig the high spots down and even them out; skipping it cost me a season of fussing.
Raised beds have one quiet advantage on timing. The soil inside them warms faster in spring than the ground underneath a lawn, which means you can plant earlier in the year than your neighbor with a flat plot.
Get the light and the level right first, and the rest of the build actually works.

Multifunctional Design: This garden planter is separated into two growing areas for different plants or planting methods. The baffle can be removed to form a bigger growing area.

Elevate Your Garden - Opt for a brilliantly engineered raised garden bed to revolutionize your gardening. Its spacious design, measuring 48x24x30 inches, allows for the cultivation of multiple vegetable varieties alongside a plethora of herbs, optimizing your gardening space for ease and diversity.

SIZE: The plant bed measure is 46"L x 23.6"W x 11.8"H. This planter box provide ample growing space to raise vegetables, flowers and plants.
2. Select Your Material
Cedar is the wood I end up recommending most often, because it lasts a decade or two on its own without any stain or sealant.
Redwood does the same job and resists termites too, but it is harder to find outside the west coast, and heart redwood has gotten really pricey.
For any wood, thicker boards pay off: 2-inch stock outlasts 1-inch fence pickets, and 2×6 or 2×8 boards outlast 2×4s. I skip treated lumber, railroad ties, and anything painted or of unknown origin.
Concrete blocks stack without tools, which makes them the fastest start if you are renting or testing a spot.
Galvanized steel runs 20-plus years with almost no maintenance, and the larger raised bed styles now come in colors and modular shapes.
Pallets work if they are heat-treated, not fumigated; the HT stamp matters. Raised bed kits ship pre-cut and eliminate the measuring stage entirely.
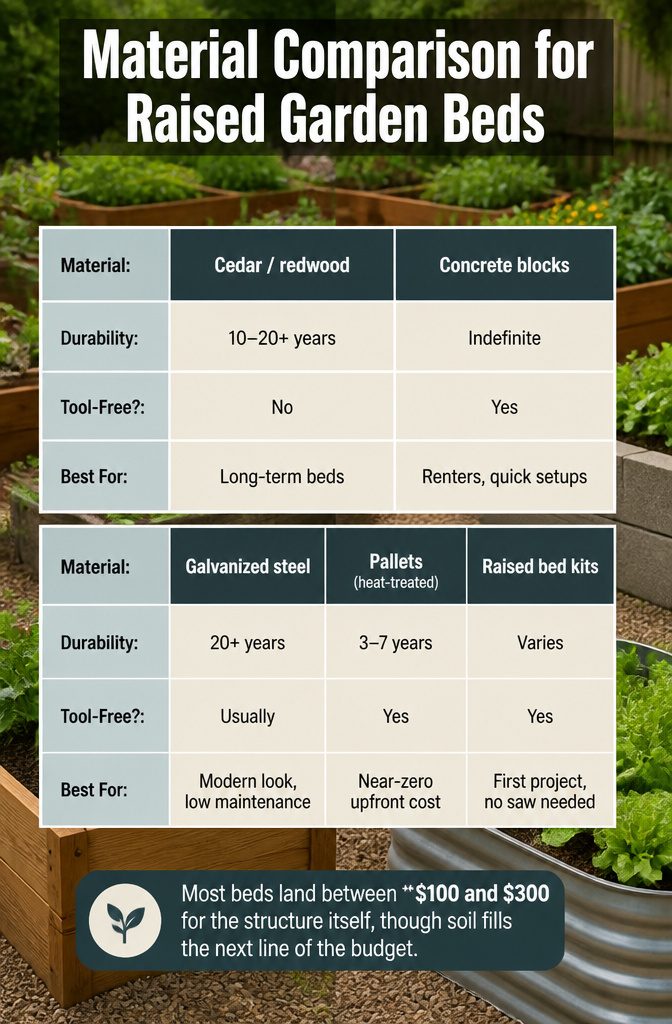
Most beds land between $100 and $300 for the structure itself, though soil fills the next line of the budget.
| Material | Durability | Tool-Free? | Best For |
|---|---|---|---|
| Cedar / redwood | 10–20+ years | No | Long-term beds |
| Concrete blocks | Indefinite | Yes | Renters, quick setups |
| Galvanized steel | 20+ years | Usually | Modern look, low maintenance |
| Pallets (heat-treated) | 3–7 years | Yes | Near-zero upfront cost |
| Raised bed kits | Varies | Yes | First project, no saw needed |
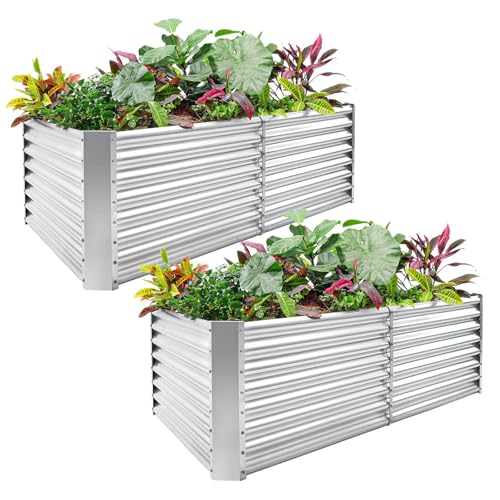
2 feet height: Compared with the ordinary 1-foot garden bed, this raised garden box has been improved in all aspects in terms of aesthetics, stable performance, and soil volume. It is time to replace the previous small planter box with a large raised planter box Now, it must be your better choice! ! !

SPACIOUS GROWING SPACE WITH EXTRA PLANTING DEPTH:Measuring 91.5" L × 47.3" W × 22.06" H, this galvanized raised garden bed holds approximately 412 gallons of soil, providing generous planting space and extra depth for vegetables, herbs, flowers and fruits. The spacious design allows roots to grow naturally while supporting tomatoes, peppers, cucumbers, broccoli, beans, lettuce, carrots, potatoes and other popular garden plants. Ideal for backyard gardening, raised vegetable gardens and outdoor planter box projects.
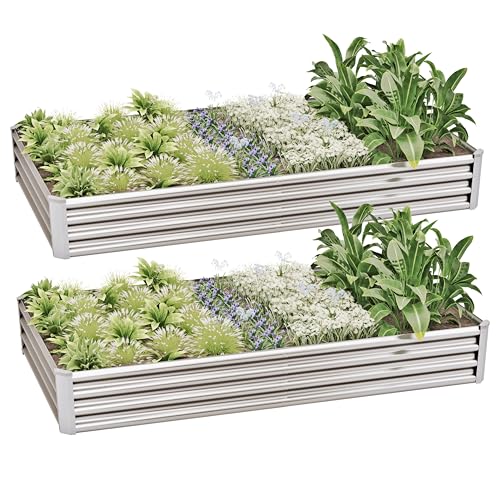
SIZE: kindder raised garden bed for gardening measure is 96"L x 48"W x 11.8"H. This planter box provide ample growing space to raise vegetables, flowers and plants.
3. Cut Wood to Size
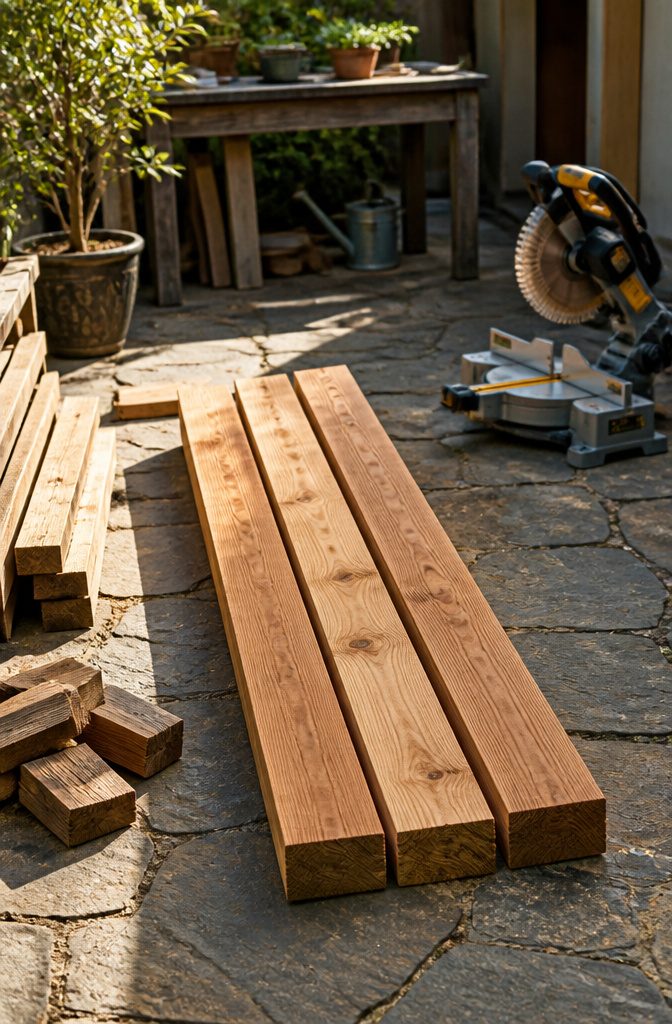
A 4 by 8 foot bed, 12 to 18 inches tall, works for most renters: big enough for tomatoes and lettuce without eating the whole patio, small enough to take apart when the lease ends.
The boards you need can be cut to length right at the hardware store, which means no saw, no sawdust in your car, and no explaining the noise to your landlord.
I built mine from 2 by 6 inch boards stacked three high for a true height of about 16 and a half inches, since a 2 by 6 actually measures five and a half inches wide.
Some people go with 18 inches for easier back access; others keep it to 12 inches to save on soil later.
The store will slice your lumber to whatever length you ask, so bring the numbers with you and double-check them before you leave the parking lot.
Straight boards matter more than perfect ones, so spend the extra minute sorting through the pile for pieces that do not bow.

4x2x1 FT Raised Garden Bed: Oval galvanized steel raised garden bed with a 12-inch internal growing depth, ideal for outdoor ground-level vegetable and herb gardening

6x3x1 FT Raised Garden Bed: Oval galvanized steel raised garden bed with a 12-inch internal growing depth, designed as an outdoor raised garden bed for vegetables and herbs in larger backyards and home gardens

Each circle raised garden bed is made of 0.6 mm thick galvanized steel for enhanced rigidity and dependable outdoor use. The corrugated metal panels help resist bending and maintain a stable round structure after being filled with soil.
4. Assemble the Frame
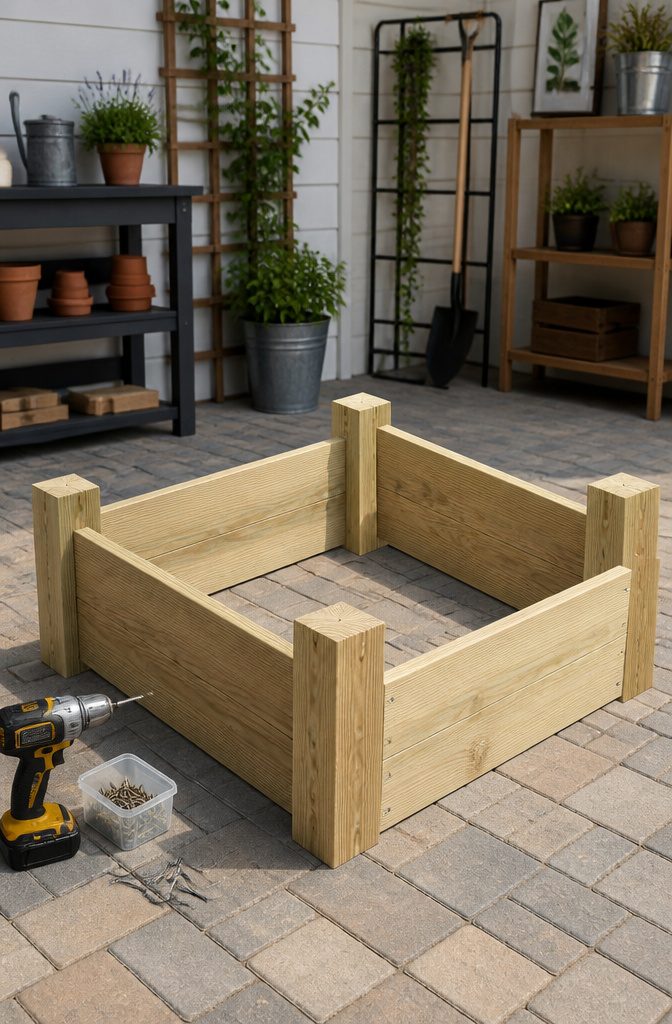
A flat garage floor or a patio beats grass for the first assembly every time.
Lay your two short sides on that level surface, corner posts spaced exactly the width of your boards, then set the 2×6 boards on top with their ends flush to the outer edge of each 4×4.
Measure the distance between corner posts at both ends before you drive a single screw; those two numbers need to match if you want a square bed that doesn’t fight you when you add the long sides.
Two 2.5 to 3-inch decking screws per board end, sunk into the center of the 4×4 and kept at least an inch from any edge, is enough to hold.
I skip pilot holes with decking screws, though if a board shifts while you work, stop and re-square before the next screw goes in. Build both short sides this way, then connect them with your long boards.
Corner blocks with slotted posts work the same in spirit: get the first two corners square and level, slide the boards in, then check square again before you add height.
A bed that slides together in under an hour is common once the ground is flat and the first corner is true; rushes at that first corner are where the extra hour hides.

ULTIMATE PRACTICALITY: The planter box measures 96"(L) x 24"(W) x 12"(H), has a huge capacity, any plants and flowers you want to grow can be planted, happiness is overflowing.

【Heavy-Duty Galvanized Steel】Built with galvanized steel panels and reinforced corners,this metal raised garden bed resists bending,warping and long-term outdoor use—perfect for a strong,stable growing space

SIX-LIGHT CONNECTED DISPLAY: Includes 6 translucent maple leaf pathway lights powered by one solar panel. The connected stake layout creates a continuous autumn display along walkways, flower beds, lawns, patios, and garden borders.
5. Line the Bottom
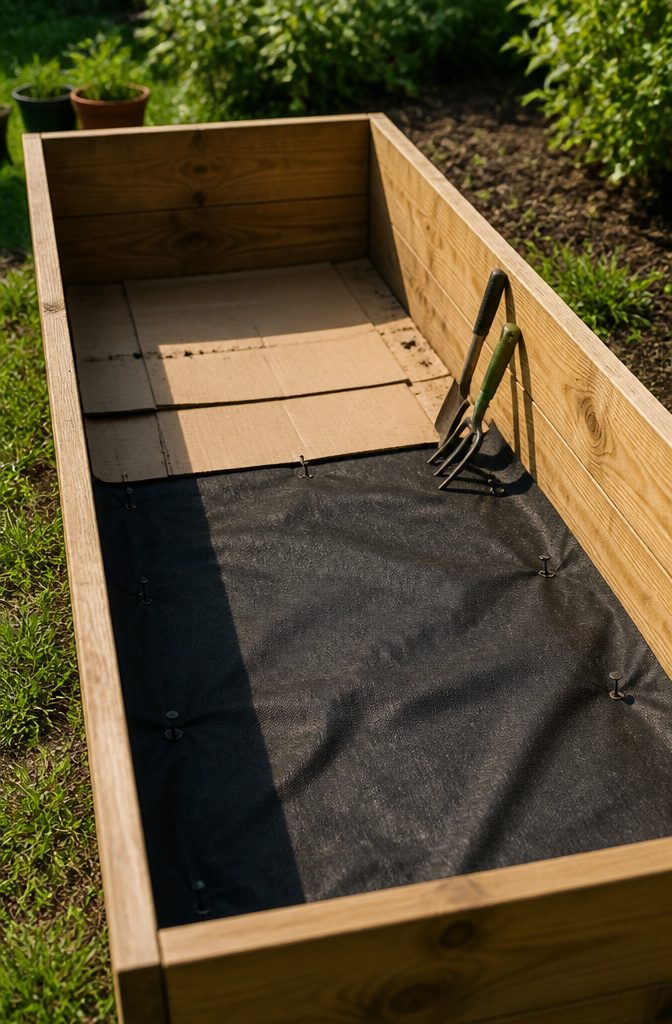
Cardboard on the ground breaks down and lets earthworms through, which beats landscape fabric on beds where tunneling pests aren’t a problem.
The fabric or a raised bed liner still has its place, especially on open-bottom frames where heavy rain can wash soil out the sides.
Hardware cloth is the only option that actually stops gophers, though nothing else in that layer will save your vegetables if they’re already in your yard; one source I read noted that in their area, nothing survived without it.
I have not had gophers myself, so I skip the metal and save the money, but the choice depends entirely on what crawls under your fence.
If you do lay a barrier, extend it a few inches up the sides to keep the soil from sneaking out at the corners after a soaking.
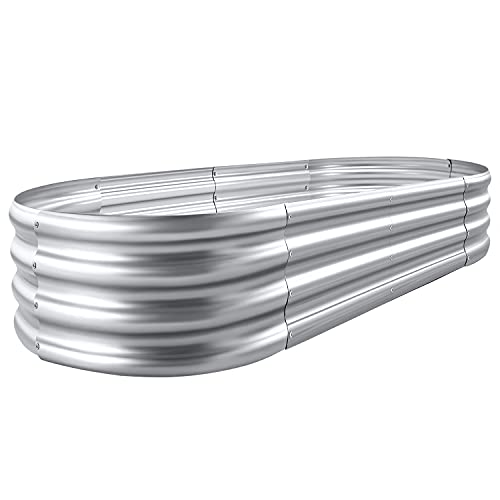
Each raised metal garden bed size: 4×2×1ft ,7.14Cu
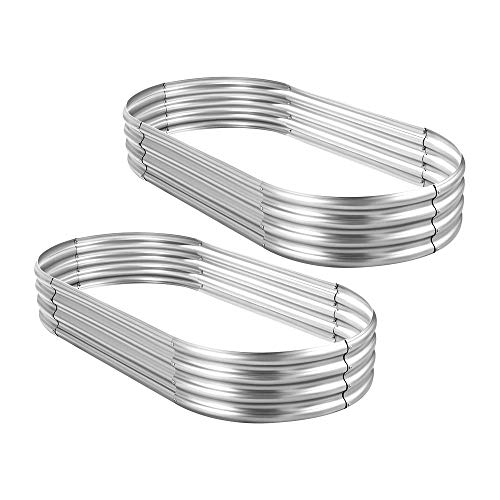
Each raised metal garden bed size: 4×2×1ft , 7Cu

Size: 60×29×11 in, 68 gallons of soil required.
6. Fill With Soil
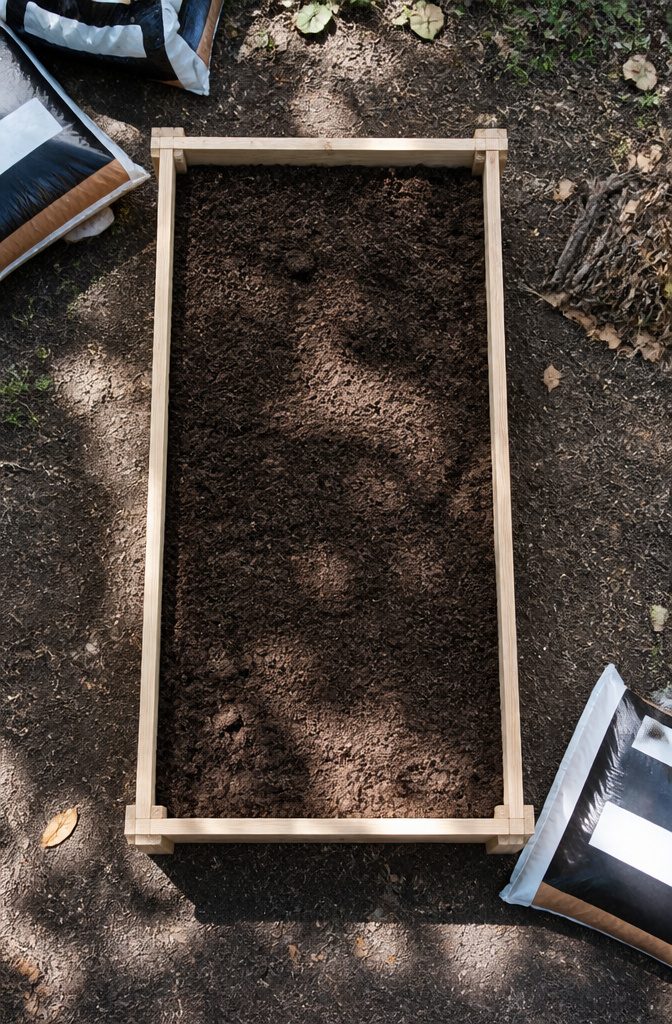
A 12-inch bed can swallow a surprising amount of soil.
For the deep-rooted crops most people build these beds for, that 12-inch minimum is the floor, not the suggestion: carrots, parsnips, and tomatoes all send roots deep enough that anything less starves them halfway down.
The fill itself is a mix of garden soil and compost, roughly two-thirds to one-third by volume.
I have not found a source that pins this to an exact ratio; some gardeners eyeball it, others treat 30 percent compost as a loose ceiling.
The honest answer is that anything in that neighborhood works, and obsessing over precision wastes a Saturday you could spend planting.
Layering saves money if you are filling anything taller than a foot. Logs, sticks, autumn leaves, and kitchen scraps go in the bottom half and break down over a season or two.
The bed settles as they decompose, so the soil line drops and needs topping off next year. That trade-off, a lower first cost against a second fill later, is the choice you are actually making.
For deep-rooted crops, like carrots, it seemed I’d need a minimum depth of 12-inches of soil, so my raised bed would need to be at least that tall.
— Bob Vila
That figure came from vegetable gardening, not ornamentals; if you are only growing lettuce or herbs, six inches suffices and the layering question barely matters.
7. Plant Seeds or Seedlings
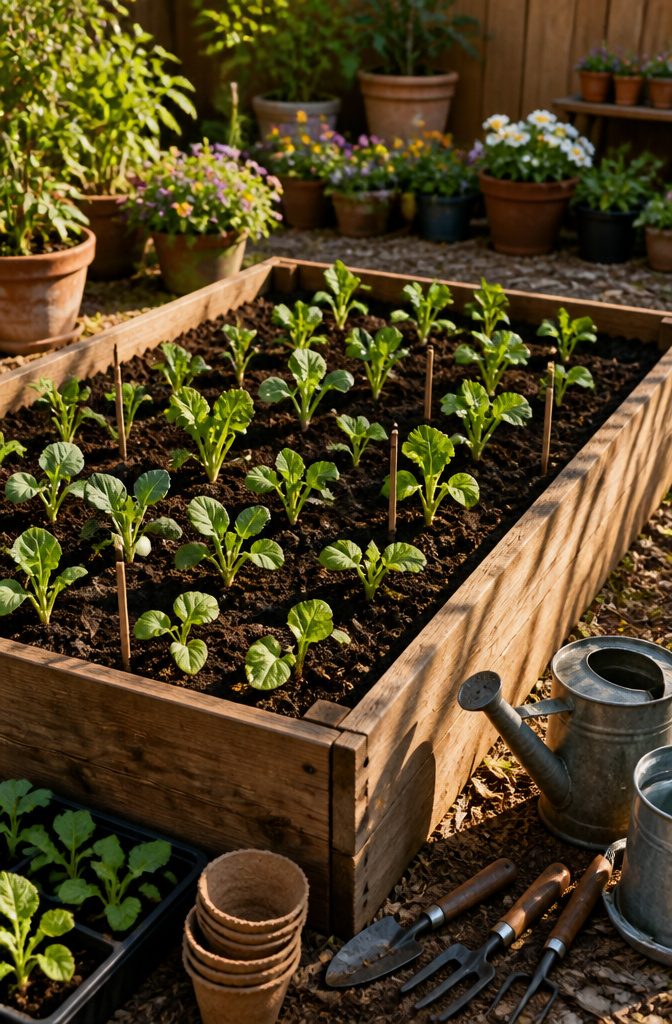
Spacing mistakes in a new raised bed usually show up two months later, when one plant smothers another or a patch of soil stays bare because roots never found room.
Each seed or seedling goes in at the distance its mature leaves will need, not the space the puny starter takes today.
Tomatoes want elbow room; leaf lettuce can live shoulder to shoulder. Most seed packets print this span, and it is worth following even when the bed looks half empty at planting.
I crowd herbs more than vegetables because I harvest them younger, and that habit has cost me a few basil plants to mildew when air stopped moving through the leaves.
Sources on easy diy raised garden bed builds rarely list every vegetable spacing, so keep a reference chart on your phone or a note in the shed.
Seedlings from the nursery tray give you a running start, but they also tempt you to overfill the frame. One flat of six-packs looks spare in a 4 x 8 bed; planted right, it fills the space for the season.
8. Water and Maintain
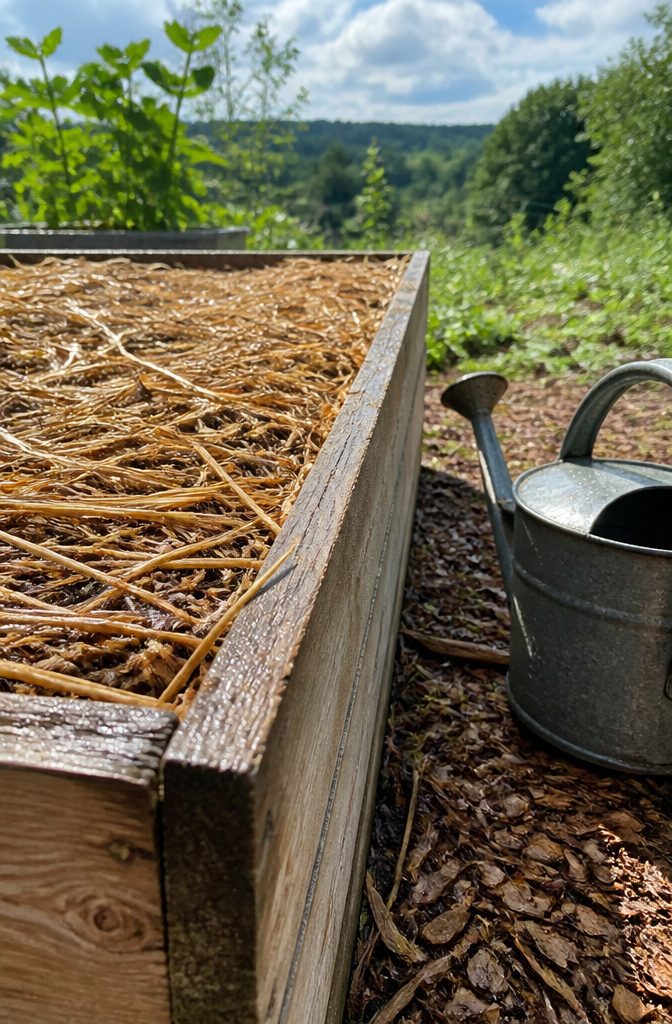
Soil in a raised bed dries out faster than ground-level dirt, and the extra drainage you paid for in lumber can work against you by mid-July.
I check moisture with my finger to the second knuckle; if it comes up clean, it is time to water. Morning is the only window that makes sense, before the sun pulls moisture back out through the leaves.
Mulch is the part that lets you skip a day without regret.
Two inches of straw, shredded leaves, or the wood chips you probably have left over from the build will drop evaporation by roughly half and keep the top layer from baking into a crust.
I lay it down after the soil is warm enough for the seeds I have chosen, not before, or it slows the spring warm-up I spent weeks waiting for.
What happens after the first season, the rotation schedules and the cover crops and the compost math, is a separate conversation than this build.
Most beds get through two or three years on the soil they started with if you add a bag or two of finished compost each spring and do not let the same plant family squat in the same corner twice running.
The rest you learn by watching what bolts, what yellows, and what the squirrels get to first.

Ready-to-Use Formula: No mixing or extra steps required. Simply pour and plant - perfect for gardeners of all experience levels.
Wood Types Compared
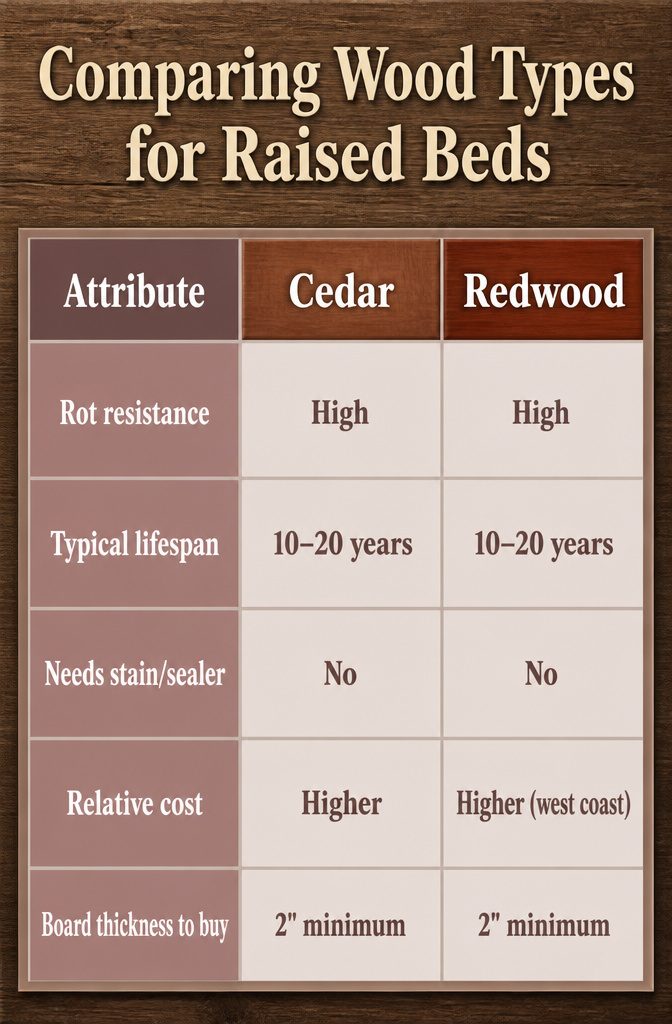
Cedar and redwood are the woods that keep a raised bed standing for a decade or two without any stain or sealer, though a non-toxic sealer buys more time if you want it.
Pine or Douglas fir cuts the upfront cost but gives you roughly three to seven years before the boards start to give out.
Thickness matters more than species: a 2-inch board outlasts a 1-inch picket by a wide margin, and 2×6 or 2×8 stock survives longer than 2×4.
I skip pressure-treated lumber, stained wood, and railroad ties entirely; the chemicals they carry are not something I want leaching into soil I plan to eat from.
| Attribute | Cedar | Redwood | Pine / Douglas Fir |
|---|---|---|---|
| Rot resistance | High | High | Low |
| Typical lifespan | 10–20 years | 10–20 years | 3–7 years |
| Needs stain/sealer | No | No | No |
| Relative cost | Higher | Higher (west coast) | Lower |
| Board thickness to buy | 2" minimum | 2" minimum | 2" minimum |
For anyone renting or planning to move, pine is the practical call: cheap enough to treat as temporary, thick enough to last the years you need.
If the bed is staying put for the long haul, cedar is the 2×6 board I would actually drive to get.

Upgraded Durability and Structure: The average thickness of this galvanized corrugated steel garden bed reaches 0.67 mm, and the thickest part can reach 1.2 mm, Multi-screw reinforcement prevents deformation and can be reused for many years
Benefits of Raised Beds
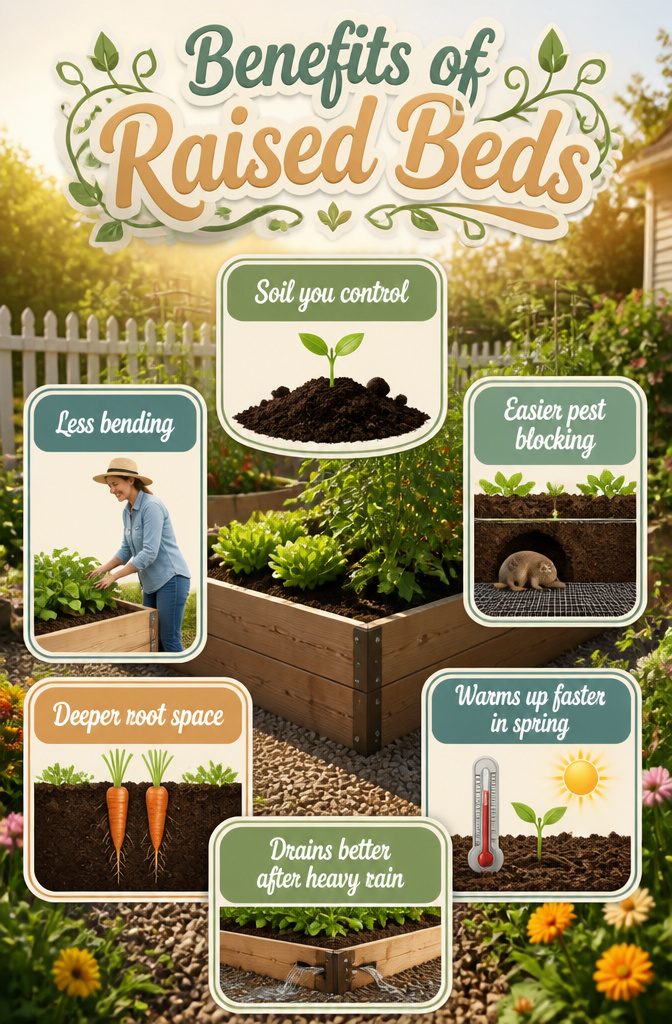
Raised beds warm up faster in spring, so you can get seeds in the ground earlier than with in-ground planting.
The soil in a raised bed also drains better after heavy rain, which matters if your yard holds water or floods occasionally.
Here is what actually changes day to day:
- Soil you control. You fill the bed with what your plants need instead of fighting whatever is in your yard. In coastal areas or anywhere the native soil is poor, this is the difference between plants that survive and plants that produce.
- Less bending. The elevated height takes strain off your back and knees, which becomes relevant faster than most people expect. Weeding, planting, and harvesting all happen closer to standing height.
- Easier pest blocking. Hardware cloth and landscape fabric across the bottom stop burrowing pests like gophers from below, and the defined edges make weeds simpler to manage than open ground.
- Deeper root space. Rocky yards that would stop carrots or tomatoes in their tracks become workable because the bed sits above the problem layer.

4X2X1FT GROWING SPACE: This oval raised garden bed measures 4 x 2 x 1 ft, providing 7+ cu. ft. of organized growing space for vegetables, herbs, flowers, strawberries and selected root crops. Its compact footprint fits naturally into backyards, lawns and small outdoor gardens while keeping plants easy to reach and maintain.

Size: 144"(L) x 48"(W) x 12"(H),Planter raised bed provide outdoor sufficient space to grow vegetables,flowers,galvanized garden bed

More suitable raised garden bed size and Volume:67"L x 20"W x10"H, 7 Cu. Ft. You can cultivate plants, like vegetables, flowers, herbs in your patio, yard, garden, and greenhouse.
Construction Tips
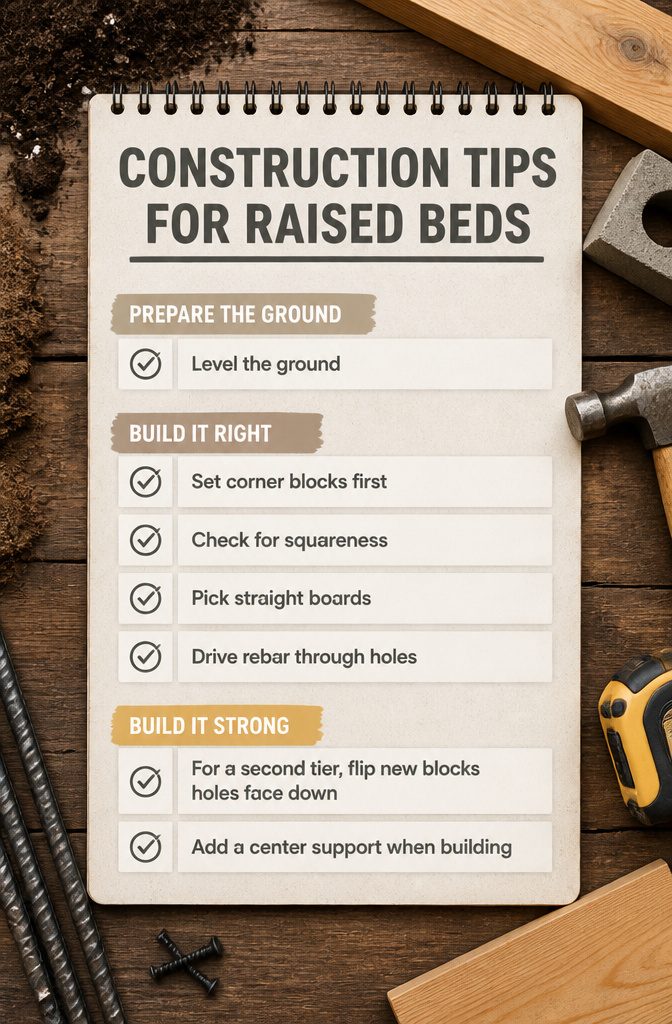
Leveling the ground matters more than clearing it. Only the spots where blocks and boards sit need to be flat, so skip digging out the entire interior if you are working alone or want to finish in an afternoon.
A few things that keep the frame from fighting back:
- Set corner blocks first, open hole facing up, then lower both boards into their slots at the same time rather than one side at a time. Doing them together keeps the notches from binding.
- Check that the bed is square by measuring the two diagonals. Equal diagonals mean square corners.
- Pick straight 2×6 boards at the store. Bowed boards will fight you during assembly and leave gaps.
- Drive 18-inch rebar through the center holes, leaving 4–5 inches above the block, before adding a second layer. For a second tier, flip the new blocks so their holes face down.
- If the span is long, add a center support when building rather than after. A 4-foot length of ledger board screwed to both sides stops bowing before it starts.
Depth for Different Crops
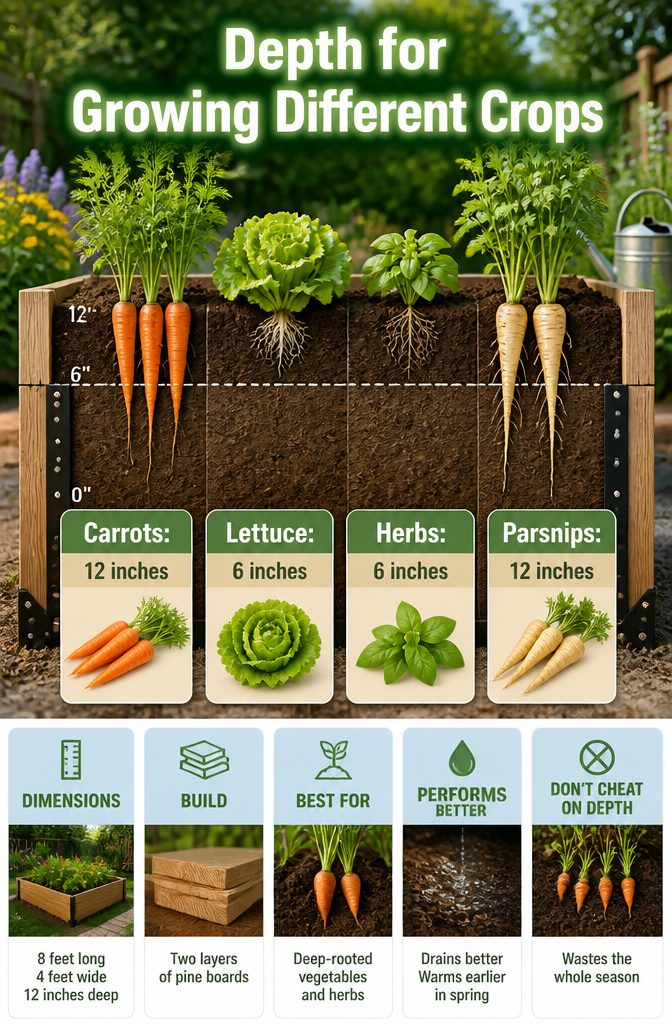
Twelve inches is the minimum depth for deep-rooted crops like carrots, and that figure shaped the whole build.
Most sources flagged it as the floor for anything with a taproot. My bed ended up exactly that: 8 feet long, 4 feet wide, and 12 inches deep, which let me grow the vegetables and herbs I wanted without guessing.
The width mattered almost as much. Four feet across means you can reach the middle from either side for weeding and thinning without stepping into the soil.
I made the length 8 feet because the pine ledger boards came in that stock size, which kept the budget down, though cedar would have lasted longer.
A single layer of those boards gives you roughly 6 inches, so I stacked two to hit that 12-inch mark.
Shallow beds work for lettuce or herbs, but if you want carrots, parsnips, or anything that builds its food storage underground, cheating on depth wastes the whole season.
The bed drains better than ground-level soil anyway, and the early warming in spring helps, but only if the roots have room to run.
Frequently Asked Questions
How deep should a raised garden bed be?
A minimum of 12 inches is the floor for deep-rooted crops like carrots, parsnips, and tomatoes.
Anything less starves them halfway down, while lettuce or herbs can get by on six inches. That 12-inch mark also lets soil warm faster in spring and drains properly after heavy rain.
What type of wood is best for raised garden beds?
Cedar and redwood are the woods that last a decade or two without stain or sealant, though redwood is harder to find and pricier outside the west coast.
Pine or Douglas fir costs less upfront but gives you roughly three to seven years. For any species, 2-inch boards outlast 1-inch pickets by a wide margin.
How do I prevent weeds in my raised bed?
Cardboard on the ground breaks down over time and lets earthworms pass through, which works well if you are not fighting tunneling pests.
Landscape fabric or a raised bed liner also blocks weeds, especially on open-bottom frames where heavy rain can wash soil out the sides.
Either way, extending the barrier a few inches up the sides keeps soil from sneaking out at the corners after a soaking.
What is the cheapest way to build raised garden beds?
Pallets marked HT for heat-treated, not fumigated, cost next to nothing and stack without tools. Concrete blocks work the same way and last indefinitely, though they run more than free pallets.
Pine ledger board is the cheapest wood option if you want a traditional framed bed, and you can have it cut to length at the hardware store to skip buying a saw.
Is it cheaper to build a raised bed or buy one?
Most beds you build yourself land between $100 and $300 for the structure, while pre-cut raised bed kits ship ready to assemble and eliminate measuring but carry a markup for convenience.
If you already own a drill and can sort straight boards at the store, building saves money. If you rent or want no sawdust and no noise complaints, a kit pays for itself in hassle avoided.
What should you put in the bottom of a raised garden bed?
Logs, sticks, autumn leaves, and kitchen scraps go in the bottom half of beds taller than a foot, breaking down over a season or two and saving money on soil.
On top of that layer, or filling the whole bed if it is shallow, goes a mix of roughly two-thirds garden soil to one-third compost by volume.
Cardboard or landscape fabric across the very bottom blocks weeds, and hardware cloth is the only option that actually stops gophers.
What vegetables don’t do well in raised beds?
Lettuce and herbs tolerate six inches fine. The real limit is depth, not the raised format itself, since raised beds warm faster and drain better than ground-level soil.